Tuesday, December 19, 2017

Un-cola Biscuits - Baking With 7UP

Most people know 7Up as the lemon-lime soda you use as a mixer for cocktails, or as the soft drink you go for when you're not feeling like drinking cola. But as our grandparents have known for years, it can also be used in baking. The carbonation in 7UP helps baked goods rise and gives them an airy, fluffy texture, making it a great substitute for baking soda, but with a hint of sweetness. This recipe for biscuits makes the most of the Un-cola's unique qualities, so you have no excuse for not whipping up a quick batch of them the next time you want something light and tasty with your meal.

Ingredients:

256 g Bisquick® brand pancake and baking mix
60 g melted butter
125 mL 7Up®
125 mL sour cream
  1. Preheat your oven to 450°F / 232°C. Melt the butter however way you want, and pour it into a casserole dish. Set the casserole dish aside.
  2. In a large bowl, mix the sour cream and the Bisquick mix together, then slowly add the 7Up and stir until you get a cohesive and sticky dough.
  3. Thoroughly coat a surface with some of the remaining Bisquick, then pour out the dough onto it, and knead it until it's not so sticky. Flatten it out the dough to about a 2.5 centimeters thickness, then cut out some biscuits using a biscuit cutter (an empty soup can or a glass also can be used).
  4. Place the raw biscuits in the casserole dish with the melted butter, and bake for 12-15 minutes, or until they are nice and browned on top.

    NOTE: You are about to eat something that was baked in a pool of butter - plan accordingly.
7UP Biscuits
7UP Biscuits


Wednesday, December 6, 2017

Cooking Technique Quick Reference

As the holidays approach, we soon will be busy in our kitchens cooking up a storm for ourselves and our loved ones. What with remembering who likes to eat what, and which ingredients to buy for that special meal you want to make, you don't have time to waste figuring out what's the proper way to cook something. Now, thanks to this infographic from the people at the Fairmont Hotels, you never have to worry about the proper way to cook something, giving you one less thing on your plate to worry about.

Produced by Fairmont Hotels and Resorts - http://www.fairmont.com/
Click the image for a larger version
Produced by Fairmont Hotels and Resorts

Wednesday, November 22, 2017

What’s in Season: Garlic Aioli

You don't have to love fruits and vegetables to take advantage of the local farmer's market. Do it to support local business and farmers; do it if reducing your carbon footprint is a concern to you, or do it to try a new recipe using produce you can certain of its freshness and quality. In the last of this series for the year, this month's featured ingredient is garlic. Related to the onion, garlic is a popular seasoning around the world and is known for its pungent, spicy flavour that mellows and sweetens considerably with cooking. In spite of its habit of giving eaters of it bad breath (this is due to allyl methyl sulfide, a volatile liquid that is absorbed into the blood during the metabolism of garlic-derived sulfur compounds; from the blood it travels to the lungs, and from there to the mouth, causing bad breath), garlic can be found in a variety of classic dishes, such as garlic bread, garlic toast, bruschetta, crostini and canapĂ©. It also makes the delicious emulsion that is garlic aioli, a dipping sauce that is great on roasted chicken, grilled fish, steamed vegetables, potatoes, or on anything you would put flavoured mayonnaise on. Once you make this recipe for it from one of my favourite cookbooks, you won't be able to eat foods without it.

Ingredients:
180 mL grapeseed oil
120 mL light olive oil (extra virgin olive oil can be used, but it's known to give a metallic taste when blended at high speed)
15 Dijon mustard
3 kosher salt
2 garlic cloves (minced if you don't have an immersion blender)
1 large egg yolk
juice from one lemon half (about 45 mL)
cayenne pepper to taste
There are two ways to make this recipe:
    • Traditional
      Blend all the ingredients together except for the oils. Slowly drip each oil in while whisking them into the other ingredients either by hand or with an immersion blender.  
    • Quick and Dirty (works more often than not)
      Blend everything until it gets a dipping sauce-like consistency.
Whatever way it's made, this sauce is good for 5 days refrigerated.
Garlic aioli

Friday, November 10, 2017

The Need To Know Classic That Is: Meatloaf

T.V. sitcoms have given meatloaf a bad rap. For years we have associated meatloaf with a tasteless lump of meat made by the most ornery of mother-in-laws, but chopped meat mixed with bread and spices and cooked in loaf form has been eaten since the days of ancient Rome. It's been a staple meal since the Great Depression, and today both Michelin star chefs and home cooks have elevated meatloaf to its rightful place as a comfort food favourite.

Ingredients:
675 g ground beef, lamb, or pork
15 g onion, finely chopped
5 g teaspoon basil
5 g teaspoon dried mustard
5 g dried thyme
5 g garlic powder
5 g onion powder
5 g paprika
1 slice white bread, fresh, stale, doesn't matter
1 egg
1 beef bouillon cube, crumbled
ketchup
milk
salt and pepper
Worcestershire sauce
  1. Preheat the oven to 180 C. Put the slice of bread in a shallow bowl and add enough milk to cover it. Let the milk soak in for about five minutes, pour out the excess, and press out as much milk as you can from the bread using the back of a spoon.
  2. In a large bowl mix the bread, the meat, the spices, the egg, and the bouillon cube together; add what you would consider an appropriate amount of salt, pepper ketchup, and Worcestershire sauce. Shape the mixture into a loaf, then place it either in an ovenproof dish or on a baking sheet, and cook for 30-45 minutes, until the juices run clear when it's pierced with a toothpick. Serve in slices with gravy and mashed potatoes; melted cheese on top is optional.

Monday, October 30, 2017

What’s in Season: Pumpkin Soup

You don't have to love fruits and vegetables to take advantage of the local farmer's market. Do it to support local business and farmers; do it if reducing your carbon footprint is a concern to you, or do it to try a new recipe using produce you can certain of its freshness and quality. This month's featured ingredient is everyone's favourite gourd the pumpkin. More than a Halloween decoration and a pie filling, pumpkins can be boiled, steamed, or roasted, and are an excellent source of beta-carotene. When used as a base for a soup, pumpkin adds a savoury smoothness that will warm you up on these chilly fall evenings, making this recipe a perfect meal to have before or after trick-or-treating.
Ingredients:
1 sugar pumpkin
1.4 L chicken stock
120 mL heavy whipping cream
7.5 g salt
chopped fresh parsley
150 g chopped onion
2.5 chopped fresh thyme
1 clove garlic, minced
5 whole black peppercorn
  1.  Preheat the oven to 165 °C. Cut the pumpkin in half from stem to base, then remove the pulp and the seeds (save and roast them for a bonus treat). Cover each half with foil, and bake in the oven, foil side up, for one hour, or until they are tender.
  2.  Scrape the pumpkin meat from the shell halves and puree it in a blender. Strain everything to remove any remaining stringy pieces, and set aside 4 cups worth of the puree. The rest can be stored in the freezer in freezer safe bags.
  3.  On the stove, heat the chicken stock, pumpkin puree, onion, thyme, garlic, salt, and peppercorns to a boil, then reduce the heat to low, and simmer for 30 minutes uncovered.
  4.  Puree the soup in small batches using a food processor or blender. Return everything to the saucepan, and again bring the soup to a boil. Reduce the heat to low, then simmer uncovered for another 30 minutes. Stir in the heavy cream, then pour into soup bowls and garnish with fresh parsley.

Friday, October 6, 2017

Vegetarian Gravy

The best gravies are made from pan drippings, something vegetarians miss out on because of the lack of meat they eat. A way for non-meat eaters to add some savouriness to their meals is to use the following recipe that takes advantage of the flavour boosting properties of miso. Found in either Asian grocery stores or at Whole Foods, miso is a thick paste-like substance made from fermented soybeans. Extremely salty and tangy, the milder versions of miso are white or yellow in colour, with the darker brown and red varieties having a stronger taste. Commonly used in soups and marinades, the traditional Japanese miso made from soy is gluten-free, while miso made from barley, rice, or other grains may not be. With its natural umami flavour, this gravy will stand on its own merits at your dinner table and will win over both carnivores and vegans.

Happy Thanksgiving everyone!

Ingredients:
710 mL vegetable broth
30 mL water
15 mL soy sauce
60 g flour
30 g miso
30 g vegan margarine (look for it in health stores or at Whole Foods)
15 g nutritional yeast
g cornstarch, dissolved in 30 mL water or soy milk, as needed
g black pepper
  1. Combine the miso and the water and whisk them both together until the miso is completely dissolved in the water (the water can be heated up a bit first in order to speed things up).
  2. In a large skillet, melt the vegan margarine over medium-low heat and whisk in the flour until a paste forms. Add the miso and water mixture, along with the vegetable broth, soy sauce, nutritional yeast, and the black pepper and stir to combine well.
  3. Allow to cook over low heat until thickened, stirring frequently to avoid any lumps forming as the liquid thickens up as with non-vegan gravy. Add the cornstarch (dissolved in the liquid of your choice first) if needed, to make the gravy even thicker if needed, keeping in mind the gravy will thicken slightly as it cools.

Sunday, September 24, 2017

What’s in Season: Apple Butter

You don't have to love fruits and vegetables to take advantage of the local farmer's market. Do it to support local business and farmers; do it if reducing your carbon footprint is a concern to you, or do it to try a new recipe using produce you can certain of its freshness and quality. This month's featured ingredient is the teacher's favourite the apple. Around since prehistoric times, apples are grown all around the world and have been cultivated for over 3000 years. There are 15 different main varieties of apples are grown in Ontario, with the McIntosh, Gala, Empire, Red Delicious, and Northern Spy varieties the most popular. If you're planning an apple-picking trip in the near future, a great recipe to try is for apple butter, a cooked-down version of applesauce that is sweeter and richer in flavour. Great on toast, pancakes or fruit parfaits, apple butter can be also used as a fat substitute in reduced-fat or fat-free cooking, as well as in vegan recipes.

Ingredients:
1 kg Ontario apples peeled, cored and diced in 5 mm pieces
175 g granulated sugar
2.5 g cinnamon
125 mL apple cider
30 mL apple cider vinegar
  1. Combine all the ingredients in a heavy-bottomed saucepan and place over medium-low heat.
  2. Cook uncovered until the apples are very tender and have darkened, occasionally giving everything a stir. After about 60 to 70 minutes, remove the mixture from the stove and let it cool.
  3. Puree everything using either a blender or an immersion blender. Pour the apple butter into a clean container, cover and chill in your refrigerator, it should be good for up to two weeks.

Friday, September 22, 2017

Preserved Lemons - Memories of a Summer We Didn't Have

This year's summer left a lot to be desired. Only two weekends from June 1 were rain free; on the days that it didn't rain, it wasn't warm. And the less said about the washout that was Canada Day, the better. It is now officially autumn, and with the threat of another bone-chilling winter ahead of us, why not remind yourself of what summer could have been with some preserved lemons? Pickling lemons supercharges their flavour, giving them a zing that you don't get from regular lemon juice or zest. A staple in Moroccan and Middle Eastern cuisine, they're great chopped up in salads and salad dressings, pestos, guacamole, hummus, and salsas; and in any chicken or fish recipe that requires lemon. And the best part about preserved lemons is that they are very simple to make, allowing you time to enjoy the nice weather we are currently experiencing.

Ingredients:
lemons
salt (kosher perferred, sea or table is fine)
water that has been boiled and cooled
  1. Wash the lemons, then trim the nubs off both ends of each lemon. Quarter each lemon, slicing them down just over three-quarters of the way to leave the slices attached at the end. Put one teaspoon of salt into the cavity of each lemon.
  2. Place about 5 g of salt into the bottom of a sterilized canning jar. Put one of the lemons in the jar, cut-side down, pressing firmly to squeeze out the lemon juice. Sprinkle another 5 g of salt on top of the lemon. 
  3. Repeat the process of stuffing a lemon into the jar and topping it with salt. The jar should be halfway full with lemon juice. If needed, squeeze some additional lemon juice into the jar to bring it to the halfway point (don't waste that lemon; slice it and stuff the slices into the jar). Once there is no more space in the jar for more lemons,  pour the water into the jar to fill it to the top.
  4. Screw the lid on the jar and store it in a cool, dark place at room temperature for three days, shaking it and rotating the jar a few times per day. After three days transfer the jar to the refrigerator and let them sit for at least a month before using (the longer you let it sit, the better). The lemons can be stored in the fridge, or in that dark, cool place they were left to pickle in for at least 6 months. Whatever dish you use them in, be sure to discard the pulp and to thoroughly wash the peel you use to remove any excess salt.

Friday, September 15, 2017

The Cardboard Smoker Box Ribs Experiment

With rib festivals happening numerous times throughout the year over the city, Ottawa's love for grilled meat has been well established. In honour of the Orleans Ribfest, I decided to try making some pork ribs using the cardboard smoker box method popularized by the cooking world's mad scientist Alton Brown.

Build Materials:
cardboard box (big enough to hold a BBQ grill in, but not so big it will take forever to heat up, something under a metre high and at least 60 cm.wide)
2 wooden dowels
BBQ grill
aluminum foil
aluminum pie pan
hot plate
old frying pan
wood chips
probe style cooking thermometer
small fan (optional)
I lined as much of the inside of the box with aluminium foil as a safety precaution.

I then cut a hole in the bottom of the box as shown below, in order to make access the wood chips easier during cooking.

Because the food needs a place to be cooked on, I inserted the wooden dowels through the box and placed the grills from my propane BBQ on top.


When it was time to start cooking, I hauled everything up from the basement, and set it up outside, placing the hot plate in the centre of the box through the hole in the bottom. I soaked the wood chips as instructed on its packaging, and then filled the frying pan with the wood chips. Placing the frying pan on the hot plate, I topped it with a pie plate with holes poked through the bottom, allowing the smoke to fill the box while protecting the burner from any juices that drip from the meat. I then plugged the hot plate into an outlet and turned it on. If you have a small fan, you place it in a corner of the box away from the hot plate so it can circulate the hot air and the smoke throughout the box, but don't be surprised if the fan runs out of power, or shuts down during the cooking process as mine did.

The night before, I prepared the pork ribs. For the rub, I went with a recipe from my go-to BBQ reference, "Weber's Way to Grill: The Step by Step Guide to Expert Grilling".

Ingredients: Rub
45 g kosher salt
30 g chile powder
30 g light brown sugar
30 g garlic salt
30 g  paprika
20 g dried thyme
20 g ground cumin
20 g celery seed
10 g black pepper (freshly ground if possible)
  1. Mix all the ingredients together in a bowl. Season the ribs with rub you created.
I placed the ribs on the grill bone side down, and then closed the box up to allow it fill with smoke. I had to be careful as the box got warm to the touch quickly About every half-hour or so, or whenever I saw less smoke coming out of the box, I carefully checked on the wood chips in the frying pan,  dumping out the burnt up wood in a fireproof container, and adding more wood chips, and adjusting the temperature control on the hot plate as needed.

YOU ARE DEALING WITH FLAMMABLE OBJECTS ENCASED IN A FLAMMABLE OBJECT - DO NOT LEAVE THE SMOKER BOX UNATTENDED!

Knowing the ribs will take at least 4-5 hours to cook, I did some yard work in the backyard, then enjoyed a few of my favourite IPAs while watching the pilot episodes of "The Defenders" and "G.L.O.W." (I liked the former more than the latter) and some "Lucha Underground" on Netflix while watching the ribs cook. Every hour or so I flipped the ribs to make sure they were evenly cooked, and sprayed them with the following liquid to keep them moist:

Ingredients: Mop / Spray Bottle liquid
240 mL apple juice
120 mL apple cider vinegar
30 mL Worcestershire sauce
  1. Combine the ingredients in either a spray bottle or a bowl if you prefer using a BBQ mop.
After several hours of smoking, I finished the ribs on my BBQ so my hungry family could get their dinner. The ribs tasted great, tender and flavourful, I was surprised by how much smokiness I got on the meat. I may not win any grilling competitions with this method, but it's not bad for something you can make with stuff you may already have lying around your house, and it's something to try in between ribfests while drinking beer in the great outdoors.

Thursday, August 24, 2017

What’s in Season: Esquites – Mexican Street Corn Salad

You don't have to love fruits and vegetables to take advantage of the local farmer's market. Do it to support local business and farmers; do it if reducing your carbon footprint is a concern to you; or do it to try a new recipe using produce you can certain of its freshness and quality. This month's featured ingredient is the diet staple around the world that is corn. Central to Mexican cuisine, corn appears in almost every dish. This adaption of this easy to made corn salad recipe is based on the Mexican street food recipe esquites, enhancing the grain's natural sweetness some creamy, cheesy goodness, along with a little bit of heat. If you feel the need to hire an authentic Mexican to make this for you in order to enjoy it, do whatever you have to do to make yourself comfortable, but please do not bring your cultural appropriation guilt here.

Ingredients:
Kernels from 4-5 ears of corn (3 cups of frozen corn can also be used)
60 g feta (cotija or ricotta salata cheese if possible), finely crumbled
60 g cilantro, minced
30 g  mayonnaise
g ancho chili powder
30 mL of a neutral cooking oil (I used canola)
15 mL fresh lime juice (about ½ a lime)
1 clove of garlic, pressed
1 small or ½ 1 large jalapeno, minced
  1. Heat the oil in a large skillet over medium-high heat. Add the corn and a pinch of salt, and leave it alone for two to three minutes, allowing the corn to char. Toss, stir and repeat until charred on all sides for about eight to ten minutes in total. 
  2. Transfer the corn to a large mixing bowl. Add the remaining ingredients to the corn, and stir until everything has been blended together. Salt to taste, and serve immediately as either a side dish or on its own.

    Note: The corn can be cooked up to a day in advance and stored in an airtight container in the refrigerator. Bring the corn to room temperature for about 15 minutes before you assemble the salad.

    Leftovers can be stored in an airtight container in the refrigerator for up to 3 days.
Esquites – Mexican Street Corn Salad

Thursday, August 17, 2017

Throwback Thursday: Deep-fried Mars Bars and SuperEx Memories

For people of a certain age, a bittersweet reminder that summer was ending was the start of SuperEX. Officially known as the Central Canada Exhibition, the EX brought exhibits and amusement park rides to Lansdowne Park every August from 1888 until 2010, pausing only during World War 2. The EX offered a lot for the people of Ottawa to see and do, whether it was seeing their first farm animals at the Cattle Castle (the Aberdeen Pavilion's old nickname); seeing the CJOH six o'clock news team broadcast live; or seeing their favorite musical acts on the stage they set up on the football field for a run of concerts. My memories of the SuperEx include the time my mom won a giant Papa Smurf stuffed doll at a ring toss game; running throughout the Midway with my boys during our adolescence; and the carnival food I tried on a double date on what turned out to be the EX's last year. I had heard that the deep-fried Mars bar, a dessert created in Scotland, would be available, and the buzz about it was good, as people were raving about it. I was skeptical about how a chocolate bar would hold up to being dunked in hot oil, and I was surprised at how well the shell-like batter crust held everything together, insulating the chocolate bar from coming into direct contact with the hot oil, and allowing the caramel and nougat inside to get all warm and gooey. I enjoyed it as much as my friend did his bison burger, but he definitely had the healthier choice. I now rely on the Capital Fair for my son to build his own summer memories of going to the fair, and the recipe below to create this decadent dessert. It's great on its own or served with a bowl of ice cream.

Ingredients:
12-15 snack size Mars bars (or whatever your favourite chocolate bar is)
1 egg
700 mL canola or other light oil for frying
180 mL milk
170 g flour
30 g sugar
10 g baking powder
2.5 g teaspoon salt
powdered sugar (optional)
  1. Heat the canola oil to 190°C. While the oil is heating up, mix the flour, baking powder, sugar, and salt in a bowl. 
  2. In another bowl, whisk the milk and egg together and add the mixture to the dry ingredients. Stir until the batter is smooth.
  3. Working in batches of 3-4 at a time, dip the chocolate bars in the batter and carefully place them in the hot oil. Cook until lightly browned and then flip and brown the other side, 3-4 minutes in total. Remove to a paper towel lined plate. Repeat with remaining bars. Dust very lightly with powdered sugar if desired.

Monday, August 7, 2017

Microwave Oven Hacks

Everyone has access to a microwave oven in a kitchen, but are you using it in the best way possible? Thanks to this handy guide from the good people at PartSelect, you can maximize your use of this time-saving appliance, whether you're reheating a beverage, or cooking a meal.

Monday, July 24, 2017

What’s in Season: Tomato-Bacon Jam With Onions and Garlic

You don't have to love fruits and vegetables to take advantage of the local farmer's market. Do it to support local business and farmers; do it if reducing your carbon footprint is a concern to you, or do it to try a new recipe using produce you can certain of its freshness and quality. This month's featured ingredient is everyone's favourite culinary vegetable, the tomato. Originating in Central and South America, tomatoes can be eaten may ways, including raw, as an ingredient in many dishes, sauces, salads, and drinks. This month's recipe makes excellent use of the tomato's natural umami flavour, and can be used on grilled cheese, crackers, or anything you would put ketchup on (as long as it's not a well-done steak).

Ingredients:
230 g thick-cut bacon, chopped
15 g brown sugar
2.5 g freshly ground black pepper
1.25 g teaspoon crushed red pepper
120 mL fresh ripe diced tomatoes
120 mL pure maple syrup
60 mL balsamic vinegar
30 mL Dijon mustard
15 mL Worcestershire sauce
2 medium cloves garlic, minced
1 large yellow onion, thinly sliced
1 bay leaf
  1. Cook the bacon over medium heat for about 5 minutes until browned. Add the onions and garlic and cook them until they are translucent and softened, stirring everything for 5 to 7 minutes. Drain any excess bacon grease from the pan.
  2. Stir in remaining ingredients and reduce heat to low. Simmer for about 1 hour uncovered, stirring occasionally, until reduced and thickened to a jam-like consistency. Discard bay leaf afterwards.
  3. Transfer everything to a blender and pulse to combine, leaving some chunks. Use immediately, or store in the refrigerator for up to 3 days.

Saturday, July 15, 2017

Satisfy Your Jerk Chicken Fix

When you get a craving for jerk chicken, it needs to be satisfied immediately. It becomes not just a food you want, but the only food you want. To answer that need for sweet, savoury, spicy meat, I have two go-to spots in Ottawa: Bananas in the east; and The Caribbean Cruiser representing the westside. As spoiled as I am with these choices, I rely on a version of the recipe found in one of my favourite cookbooks for the days I don't want to go out in public to eat; it may take a while to complete this dish, but it is worth it. It definitely puts to shame the "jerk" roast chicken offering currently being sold at a local supermarket; your craving deserves better than that.

Ingredients:
20 whole allspice berries
10 sprigs thyme
5 whole cloves
3 star anise pods
2 habaneros, seeds and ribs removed, roughly chopped
2 garlic cloves, peeled, roughly chopped
1 bottle cola
juice of 1 lemon and 1 lime
1 whole nutmeg
1 cinnamon stick
1 5 cm piece ginger
1.4 kg chicken thighs, bone in, skin on
170 g packed brown sugar
15 g kosher salt
15 g browning seasoning, optional (look for it in the "international" section of your supermarket)
canola oil
  1.  Place the chicken thighs in a bowl and cover them with kosher salt. Pour cola in the bowl until the chicken is covered, stirring to dissolve the salt. Place the entire bowl into the refrigerator, covering it with plastic wrap for 12-24 hours.
  2.  Combine and grind until fine the nutmeg, allspice, star anise, cinnamon stick, and cloves using a blender (a spice grinder or mortar and pestle can also be used). Place the ground-up spices in a small pan over low heat to toast, moving them constantly for about 2 minutes. When the spices are nice and fragrant, pour them into a blender.
  3.  Cut the ginger root in half lengthwise, with the skin still on. Char the root until the skin is blackened (on the grill, under the broiler, in the toaster oven - you figure it out), then roughly chop it, and add it to the spices in the blender, along with the brown sugar, the citrus juices, the peppers, the garlic, the browning seasoning (if using), the thyme, and the salt, and blend on high until everything is smooth.
  4.  Take the chicken from the fridge, and place the chicken in a large resealable bag. Add the marinade, seal the bag, and allow the meat to get covered. Put the bag in the fridge and allow the thighs to marinate for at least 8 hours or up to two days.
  5.  Get your grill ready for medium-high heat. Grease the grates or your grill pan with the canola oil, and place the thighs, skin down onto the grill over direct heat or in the pan. Cook for about ten minutes, or until the skin releases itself from the cooking surface. Flip the thighs over, and cook for another ten minutes, or until the juices run clear, or you get a reading of 74°C from a meat thermometer.

Thursday, June 29, 2017

"Chop Chop" - Review of a Cooking Magazine for Kids

Even though the school year has ended, it doesn't mean kids can't learn over the summer holidays more about cooking and the food they eat. "Chop Chop" is a food magazine for the "chickaDee/Owl magazine set that focuses on nutrition and easy to make recipes, along with games and puzzles, food facts, and interviews with celebrities, and both child and professional chefs. Published quarterly, it is both critically acclaimed and trendy enough for young elementary school foodies (few recipients of the James Beard Foundation Award for Publication of the Year have recipes for avocado toast AND a recipe featured in "Bon Appétit" (yes, this basic children's recipe was featured in an adult cooking magazine as a thing)). If you're looking for a cool addition to a child's summer reading list, check to see if your local public library carries it.


Saturday, June 24, 2017

What’s in Season: Teriyaki Steak and Berries

You don't have to love fruits and vegetables to take advantage of the local farmer's market. Do it to support local business and farmers; do it if reducing your carbon footprint is a concern to you; or do it to try a new recipe using produce you can certain of its freshness and quality. Inspired by a recent trip with my son's class to Proulx Sugar Bush and Berry Farm,  this month's featured ingredient is the strawberry.  A member of the rose family, strawberries are a great source of vitamin C, fibre, and potassium, and are best when picked ripe. Though usually made into preserves and desserts, strawberries can be found in salads during the summer, as a great way to highlight the burst of colour and flavour that can add to foods. If you're looking for a light summer dish, you can't go wrong with the recipe below.

Ingredients:
4 cups torn spinach leaves
4 cups torn romaine leaves
3 cups halved strawberries
2 cups sliced white button mushrooms
375 g top sirloin grilling steak, about 1 cm thick
45 mL seasoned rice vinegar (4% acidity)
45 mL canola oil
25 mL teriyaki sauce
20 g toasted sesame seeds
10 mL finely minced gingerroot
10 mL honey
2 green onions, diagonally sliced
fresh ground black pepper
  1. In small bowl or measuring cup, whisk together the rice vinegar, canola oil, teriyaki sauce, ginger, honey and pepper to taste. Set aside.
  2. Sprinkle both sides of steak with pepper to taste. Place on greased grill over medium-high heat; close lid and grill for about 4 minutes per side for medium-rare or until desired doneness. Remove to a cutting board and let the meat stand for 5 minutes before thinly slicing across the grain.
  3. In large bowl, combine the spinach, romaine, strawberries, mushrooms and green onions. Set aside about 25 mL of dressing, and toss the salad with the remaining dressing. Arrange the salad on either a platter or on salad plates; top with the beef, and drizzle everything with the reserved dressing and a sprinkling of the sesame seeds.

Friday, June 16, 2017

A Night at the Urban Element

One of my birthday presents this year was a hands-on cooking lesson at the Urban Element, an open concept kitchen and communal dining area located in Hintonburg. The original plan was for me to take the Knife Skills class they offered, but it was sold out so my wife enrolled me in "Springtime in Latin America" instead. It dawned on me as I made my way there that this was the first time I've been in a classroom learning to cook since I was in Home Ec. class at Alta Vista P.S. Luckily I'm a lot more interested in food than I was in elementary school, so I was excited to see how the evening progressed.

Once there, I was greeted by the host, Rachel, and led to the area where the lesson was to be held. I liked the wood, brick, and stainless steel throughout the cooking area; it was hard to believe the building was once a firehouse. Settling into an available spot, I saw it was a full house, about 16 in total. It was a good mix of people, everyone from hardcore foodies to a family of four, to newbies like myself. As we all introduced ourselves, I learned I was one of two guys there whose wives thought they could use a culinary skills update - are they subtly trying to tell us something? We were then introduced to our instructors, Devin, UE's Executive Chef, and his sous-chef Tessa. Listening to the two of them, you could see that they were passionate about food and cooking. Their enthusiasm was infectious, and I was excited to jump into the lesson until I heard the number of dishes we had to prepare. Tortilla soup; gulf shrimp and sea bass ceviche with 'leche de tigre'; Argentinian beef empanadas; tacos with crispy chicken thighs topped with Mexican mole sauce; tres leche cake with dolce buttercream and Malbec meringue - that's a lot for one guy to do in three hours. However, I was relieved to learn that we were to separate into teams, and head to different stations around the cooking area to prepare the different parts of the meal. With all the prep work done beforehand, and Devin and Tessa helping finish anything if time becomes a factor, I felt more confident we would finish our goals.

Hearing AarĂłn Sánchez talk about mole sauce on "Chopped" for so long, I immediately made my way to that station. After introducing myself to the two people already there, we all started chopping up and mixing the ingredients. The recipe needed a charred shallot, so I grabbed some tongs and charred it with the flame from a hotplate instead of using the cast-iron skillet we had access to. My partners gave me some funny looks when I did that, but they were not concerned enough to complain about it. There was a complaint though about the amount of jalapeño needed for the sauce. Having to adjust spicy food to sensitive palates sucks. I don't want or need an insanity pepper level of heat in my food, but I do want enough to know that it's there. In order to maintain harmony with the team, we erred on the side of caution. Once the sauce was bubbling, we started on frying the chicken thighs for the tacos. Because I was standing the closest to the deep fryer, I ended up cooking most of the chicken thighs; hindsight being 20/20, I should have moved to a different station to learn how to cook something new. Fortunately, that opportunity came when I was put on tortilla making duty. As I rolled and shaped the dough, I noticed that as spacious as the cooking area was, it filled up pretty quick with everyone buzzing around working. With all different components being made, and the calls of "Behind you" as people passed from one spot to another, I realized this is the closest I'll ever get to cooking on a line (stop snickering actual line cooks - I know what I did in the class is nothing compared to what you do every day). If only food culture was as big back in the day as it is today, maybe working in a kitchen would have been a reality instead of a dream...

Once the majority of the cooking was completed, we were asked to return to our seats while Devin and Tessa plated everything. We got to sample some wine while we chatted among ourselves; I would have preferred a cerveza, but I made due with what they poured in my glass.  Finally, it was time to eat. We started with the soup, it was silky and peppery all at once. I got what was said at the start of the course about the layering of flavour, and the fried corn tortillas sprinkled on top added a nice crunch to the dish.

Next was the ceviche, and it blew me away. Light, refreshing, tasty, I now get why Action Bronson raves about the stuff. Like the tortillas in the soup, I was loving the fried plantains that topped the dish, so much so, I plan to add more crunchy texture to the foods I make. I may not make the version that was made that night, but I will make the ceviche recipe found in my favourite cookbook at some point this summer.

The next plate was the empanadas, and though my first bite was just a mouthful of the baked pocket, once I got to the filling inside, I liked what I was eating. I'm not big on raisins or olives but mixed in with the other spices, it adds a nice sweet-salty flavour to the beef.

Without breaking my arm patting myself on the back, the chicken tacos and tortilla came out beautifully. The buttermilk-brine-and-dredge technique for fried chicken makes all the difference, and now that I know I can make a passable tortilla, I have to find that breakfast taco recipe on the "Sin City" DVD that Robert Rodriguez says he made for the actors during the filming.


We ended the meal with the tres leche cake. I'm not much of a dessert guy, but it's hard not like something that light, sweet and fluffy. I was sorry when I finished my last bite, as I had a blast cooking and eating that evening.  I'd recommend going to Urban Element if you're looking to expand your cooking skills, looking for a fun date night experience, or if you want to treat yo' self to a cool foodie experience. With their approachable chefs and state-of-the-art cooking studio, it will definitely change your views on cooking in a classroom.

Wednesday, May 24, 2017

What’s in Season: Mushroom Confit

You don't have to love fruits and vegetables to take advantage of the local farmer's market. Do it to support local business and farmers; do it if reducing your carbon footprint is a concern to you, or do it to try a new recipe using produce you can certain of its freshness and quality. This month's fresh ingredient is everyone's favourite fungus, the mushroom.

Available year-round, mushrooms are a good source of vitamin D and are one of the more versatile ingredients around. A great way to use them is in a confit, a preservation method that slow-poaches the mushrooms in oil, intensifying their flavour. Then they can be added to omelets; macaroni and cheese; used as pizza toppings; tucked under the skin of a roast chicken, or anywhere else you can think of that needs an umami boost.

Ingredients:
680 g mushrooms, all the same type or assorted

NOTE: Unless you are an experienced mycologist, DO NOT USE ANY MUSHROOMS YOU FIND IN THE FOREST

120 mL to 240 mL olive oil or grapeseed oil
30 g minced shallots
15 g fresh thyme leaves
5 g kosher salt
  1. Wipe the mushrooms clean with a damp paper towel. If the stem is edible, simply trim the ends; otherwise, separate the caps from the stems (they can be used to make a mushroom broth). Cut the caps into 1/2-inch pieces, or confit the caps whole if they look good.
  2. Place the mushrooms gill sides up on a baking sheet. Sprinkle with the salt, then set them aside to dry-brine for 30 minutes. If diced, sprinkle the mushroom pieces with the salt and skip the 30-minute rest.
  3. Heat 1/2 inch of the oil in a heavy skillet large enough to hold the mushrooms in a single layer, over medium heat. Once the oil starts to shimmer, add the shallots, and let everything cook for several minutes, until translucent. Add the thyme and the mushrooms, gill sides up. Reduce the heat to medium-low and cook for 15 minutes, turning the mushrooms over halfway through.
  4. Add enough oil so the mushrooms are fully submerged; cook gently until the oil hits 77 degrees °C on an instant-read thermometer, for about 20 minutes, then remove the skillet from the heat, and let the mushrooms cool in the oil.
  5. Pack the mushrooms in a clean glass jar, gently layering each one in the jar, then covering with oil; continue layering and adding oil until all the mushrooms have been packed in the jar. Run a chopstick or a plastic knife along the inside of the jar to release any air bubbles. Make sure the mushrooms are completely submerged in the oil, then cover and refrigerate until ready to use (for up to 2 weeks).

Friday, May 19, 2017

Q & A with John Thomson, BBQ Instructor and Canadian BBQ Champion

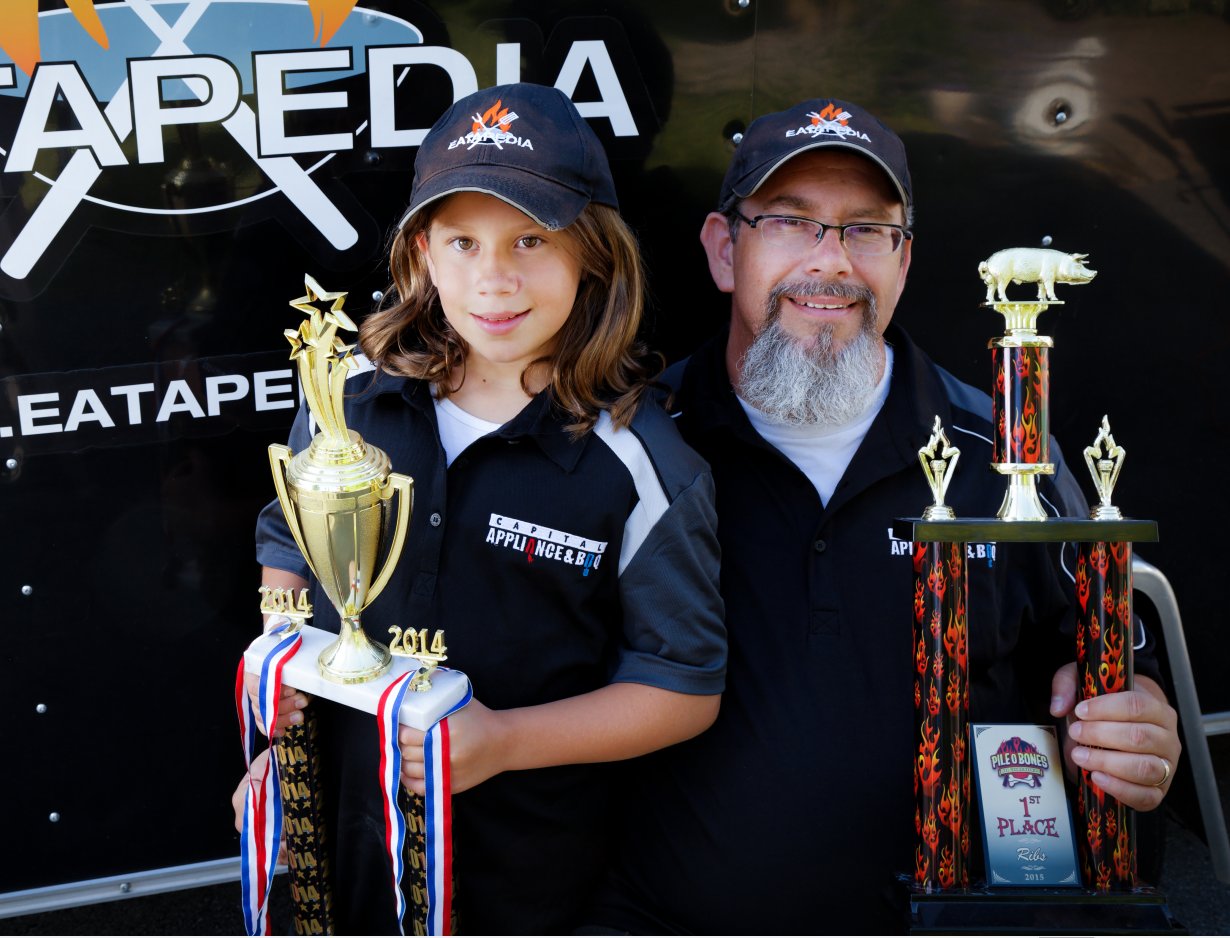
Most people on the long weekends are down for firing up the ol' BBQ and throwing on some meat to grill, but John Thomson takes his barbecuing a lot more seriously. When he's not working as an IT professional, he's competing in BBQ competitions, as well as teaching people about the finer points of BBQ cooking. I had a chance to ask him some questions via e-mail recently, and here's what he had to say.


FRANKLIN on FOOD: What's the difference between the barbecuing you do, and the steak and burgers I'm cooking on my grill?
JOHN THOMSON: What Canadians typically call "BBQ" is actually more commonly known as "grilling". This is the technique of cooking hot and fast, alternating between direct and indirect cooking.  It's what most of us started doing, and usually on a propane gas grill.

What we do is more traditional BBQ.  That is, low, slow and usually cooking indirectly, often in a smoker with temperatures ranging from 200 - 250 degrees F.  For instance, a pork butt we might cook for 12 - 18 hours in order to get the fat and connective tissue to render down and resulting in soft, juicy and flavourful meat.

Both are legitimate and popular cooking techniques.  Some BBQ competitions actually have a grilling contests too.

FoF: Is what's cooked at RibFest true BBQ?
JT: That's a great question.  The quick answer is, "Yes, it often is".  Now, it may not be low and slow for 6 hours or more, that just isn't practical given the volume of food those vendors have to turn out at a Ribfest.  But most is cooked on big commercial smokers, slathered in sauce and they make plenty of it.

FoF: How did you get interested in this style of cooking?
JT: I started with a pellet smoker, after my buddy bought one and cooked a prime rib and some bacon-wrapped, cheese-filled jalapeños.  I was hooked right there and then.  You just cannot beat the taste, the textures, and the smells from a long and slow cook.  And bacon?  Come on...

I bought mine and immediately started figuring out ribs.  You see, I once boiled ribs based on the advice of my Dad.  I couldn't eat them, I was so grossed out by the brown and gray foam in the pot.  But when I got my pellet cooker, I worked on ribs for a good year before being pleased.  I entered and won my first BBQ Competition with those ribs, and 8 years later, I still cook that same recipe, and I still win a fair amount with those ribs.

FoF: Do you think BBQ gets its due as a way of cooking?
JT: I think that, in Canada, it is starting to gain respect as a true form of cuisine, and not just something that happens on the back deck with a beer in hand (not that there's anything wrong with that!) for 2 months of the year.  With more BBQ supply stores opening or growing like Capital BBQ and several new BBQ restaurants opening, I would say that this is reflective of an industry that is really growing in Canada.  It helps having a good selection of quality BBQ restaurants, as this is how most of the public is introduced to this style in the first place.

FoF: Gas or charcoal, what's the better grill?
JT: Gas is fast, easy and hot.  That's why most people are drawn to it.  Sadly, many don't realize that charcoal is easy to use and the results are inarguable better.  Using a good quality charcoal, it is incredibly easy to build and maintain a cooking area that is perfectly suited for the dish.  Throw in a chunk of wood like hickory, cherry,maple....and the results are even better.
I do not own a gas grill.  I can get my Kamado style ceramic cooker, blazing hot in minutes.  Or I can maintain a low heat in order to add some some flavours.

All that to say: Charcoal is better, in my opinion.

But there are other options we shouldn't discount, such as a pellet cooker that works with a digital controller where you set the target temperature and let technology do all the work for you.  A great entry-level cooker, and an easy way to make great foods.

FoF: What's a good starting meat for beginner BBQers?
JT: When starting out, and learning your cooker, you will want to try a meat that is forgiving and not terribly expensive.  Pulled pork is perfect for this.  Using the right cut of pork, the "pork butt" (a part of the shoulder, named after the barrels or butts, they were shipped in, not an anatomical reference.), all a new cook has to really do is make sure they cook it to an internal temperature in the 190 - 200 degrees F range and that's it.  This allows cooks to experiment with flavours, temperatures and rubs without worrying too much about perfect the meat itself. After that, people tend to drift towards ribs and then they have their eyes on beef brisket.  But, I like to advise people to walk, then run.  Learn your cooker, get comfortable and above all:  HAVE FUN.

FoF: What's the number one mistake people make when BBQing?
JT: Cooking too fast, with too much heat.  Many people are surprised by how much cooking power you can get out of a small amount of charcoal, so they tend to fill their charcoal bowls, get it fired up and then burn their foods up.  A little goes a long way!

FoF: There are various American regional styles of BBQ, are there any Canadian regional styles that you're aware of?
JT: Most Canadians are drawn to the sweet and sticky BBQ which is very common in the Kansas City region.  But we are starting to see a rise in Texas BBQ coming to Canada, at places such as Adamsons in Toronto or Meatings in Ottawa.  Food that is cooked with a minimal of complex flavoured rubs, and often without sauce on the meat.  This allows the flavours of the smoke, the wood, the meats to all come together for an incredible experience.  I am very happy to see this style on the rise up here.

FoF: Is there a BBQ style that you prefer, and why?
JT: I like it all.  Sweet, spicy, mustard, tangy.  I just don't much care for vinegar sauces.  I've never had a pallet for vinegar, so that North Carolina style kind of throws me off a bit.  But otherwise, bring it on!

FoF: If you're not cooking it, where's a good BBQ place in Ottawa, and what do you order?
JT: There are a few great spots in town, we are very lucky in Ottawa these days!  Out West I like to visit Red Shack BBQ on Carp Rd.  It's exactly what it sounds like: A little red shack with big BBQ flavours.  In the Market area, Fatboys Southern Smokehouse is a fun and vibrant place with a wide variety of unique takes on some standard fare.  In the east, you can not beat the newcomers at Meatings.  They operated a BBQ catering business in Ottawa for 5 years before opening this restaurant.  It's a cozy spot in Orleans and their brisket (ordered "fatty" for more flavour) and ribs are unparalleled in Ottawa.

FoF: How did you go from grilling for trophies to teaching at Canada's BBQ School?
JT: I have been teaching BBQ Clinics at Capital BBQ for about a year now, and while that allows me to teach backyarders of all walks.  It's a ton of fun.  But the BBQ Classes that I offer through BBQClass.ca is more aimed at people who are considering entering the world of Competition BBQ, or existing teams looking to up their games, or anyone who wants a taste of a different aspect of BBQing.

FoF: How many hours go into planning all the details when someone enters a BBQ tournament?JT: All of them.  LOL!  As a cook, I plan and plan.  I make lists and then lists of lists.  I Practice, I test, I tune and I record everything.  But that's me.  For anyone new thinking of entering a contest (such as the Capital BBQ Festival being held this Aug 4 - 6 at the Carp Fairgrounds), there are a great amount of resources available to them, to help get started.  First off, I would point them to the Canadian BBQ Society, a non-profit organization who organizes all of the Teams, Judges and Organizers in Canada and promotes BBQ Competitions from coast to coast.  They have a very active Facebook chat page as well as packing lists and advice of all kinds for anyone considering this.
Additionally, becoming a "Certified BBQ Judge" is a great way to learn what the judges are looking for when you serve your dishes.  Many cooks are also judges for this reason.  There is a Certified BBQ Judge Class being offered on August 4th at the Capital BBQ Festival.

FoF: What will be some of the highlights at this year's festival?
JT: With demos, bands, vendors and a beer garden, this event is unlike anything Ottawa has ever seen before. We have a HUGE focus on engaging the General Public at this event.  3 of our events are actually judged by the general public!  Friday from 6 - 7 PM is our People's Choice Chicken Wing Contest.  25 Pro BBQ Teams will be cooking up Wings for the public to sample, and then they text their votes to help us determine the winners. Saturday we are hosting a Charity Ribfest where we sell Judges Seats and the teams are cooking their best BBQ ribs for the judges to sample and vote on. Sunday from 2 - 3 PM is our People's Choice Pulled Pork Contest.  Same idea but this time the public gets to sample authentic competition grade pulled pork!

All funds raised from these events will be directed to our charities.

Friday, May 5, 2017

So Long, and Thanks for All the Pan Galactic Gargle Blasters...

A lot of people were taken by surprise, and many more were saddened at the news of the closing of the famed Zaphod Beeblebrox nightclub. Named after a character in Douglas Adams' "Hitchhiker’s Guide to the Galaxy" novel, the "Nightclub at the Edge of the Universe" featured performances from local and international acts of all sorts of genres and played a huge role in growing Ottawa’s music scene. I saw Fishbone there back in 2002, and it always was a refuge for me on nights I wanted to hear music that wasn't the latest top 40 hits I didn't want to hear on the radio while having a drink in the Market. One of the drinks Zaphod's was known for is, not surprisingly, the Pan-Galactic Gargle Blaster. The recipe for this version of the cocktail mentioned in the novel may not leave your brains feeling like they were "smashed out with a slice of lemon, wrapped around a large gold brick", but it will definitely ease the pain of losing a bar that meant a helluva lot to a helluva lot of people.

Last call is May 14 - if you're going for a last drink, remember to bring your towel.

Ingredients
120 - 180 mL orange juice
30 mL Jack Daniel's® Tennessee whiskey
30 mL peach schnapps
10 mL Blue Curacao liqueur
  1. Shake the orange juice, the whiskey, and the peach schnapps in a shaker 3/4 full of ice.
  2. Once chilled, strain the mixture into a highball glass and drizzle the blue Curacao liqueur over the top of it. Add a citrus twist, and/or olive.

Wednesday, April 26, 2017

What’s in Season: Asparagus with Almonds

You don't have to love fruits and vegetables to take advantage of the local farmer's market. Do it to support local business and our farmers; do it if reducing your carbon footprint is a concern to you; or do it to try a new recipe using produce you can certain of its freshness and quality. This month's fresh ingredient is asparagus, a vegetable I've talked about in a previous post. It works as a side dish to almost any main course, and best of all, it's easy to make.

Ingredients
450 g asparagus, washed with the hard fibrous parts of the stems broken off
30 g chopped almonds
14 g butter
salt
pepper
cayenne pepper (optional)
  1.  Melt the butter over medium heat in a pan large enough to hold all the asparagus.  Once the butter has melted, cook the almonds in the butter until the butter and almonds have browned (if you want to spice things up a notch, this is where you would add the cayenne).
  2.  Add the asparagus to the pan. Season them with salt and pepper, then move the asparagus around with a large silicone spatula or a wooden spoon, scooping the butter and almonds up on top to coat them. The asparagus can then be cooked in the pan as long as you keep the asparagus spears moving, about 6 to 8 minutes. The asparagus should be crisp but without a raw taste.

    Alternative method: Steam the asparagus for two minutes, then sauté them in the almond/butter mixture.

Thursday, April 20, 2017

Cooking at 4:20

People have been eating marijuana for almost as long as they have been smoking the stuff. With the news that Canada will legalize marijuana by July 1, 2018, the countdown has begun on when the public can legally get their hands on the wide variety of products containing THC, the chemical compound that makes cannabis so enticing to people. If eaten as is, weed isn't very effective, as the digestive system is unable to digest THC. However, THC is fat soluble, which is why people cook their pot with a fat; when cooked and heated, this releases the THC from the cannabis and into the fat. One of the more popular ways to put marijuana in food is using cannabutter. In honour of 4:20, here's a recipe for making this popular pothead spread:

Ingredients
454 g butter
240 mL water
40 g marijuana, grounded up 
(NOTE: Until the law is officially changed, possession of marijuana is still illegal. Don't blame me if you get arrested.)
  1. Put the water and the butter in a saucepan, and begin simmering everything at a low heat to let the butter melt (adding water helps to regulate the temperature, and prevents the butter from burning).
  2. Add the cannabis, and let the mixture simmer for 2-3 hours, stirring occasionally. Be sure to never let the mixture come to a full boil.
  3. Once the simmering is complete, pour the mixture into a glass, refrigerator-safe container - use either cheesecloth or a fine strainer to strain out all the plant material. Get as much liquid out of the plant material, then throw it out. Cover and refrigerate what's in the glass container overnight, or until the butter has hardened and separates from the water, which should also be thrown out.
  4. Use as you would regular butter. To test for potency, start with one portion of a serving, then wait an hour or two. You'll know if you require more or not, so don't drive or use heavy machinery while under the influence.

Sunday, April 2, 2017

Mother's Day Limoncello

Just because everyone's favourite Hallmark holiday is several weeks away doesn't mean it's not a good time to think about what you should give dear old Mom as a present. And what would be better for the woman who fed you, and put up with so much of your crap, than a homemade lemon liqueur popularized in Italy over a century ago. Traditionally made from the zest of lemons, it is steeped in grain alcohol until the lemon oil is released. The resulting yellow liquid is then mixed with a simple syrup. Served chilled as an after-dinner digestivo, it`s perfect for sipping after the dinner you made or took your mom out to, or for when you and mommy are sitting around shooting the breeze on a warm day.
20 lemons
1.75 L Everclear or 100-proof vodka
sugar
water
  1. Wash and peel the lemons with a sharp paring knife to remove all the white pith from the inside of the peel (it gives the limoncello a bitter taste), or a microplane to remove the zest from the lemons. Put the skins or the zest in a clean glass or plastic container large enough to hold at least 2.5 litres.
  2. Add the alcohol and seal the container. Wrap it in plastic and then in aluminum foil (to shield it from the light), and let it sit in a cool place in the back of the cupboard or in the basement for 2 to 4 weeks (the longer, the better). Shaking the container at various times isn't necessary, but it won't hurt.
  3. After the infused alcohol has sat for a period, make a simple syrup by combining 475 mL water with 400 g sugar in a saucepan. Bring the mixture to a boil, stirring frequently, for 2 to 3 minutes. Let the syrup cool completely by placing the pan in an ice bath.
  4. Strain the peels out of your alcohol mixture (you will have to do multiple strainings if you used lemon zest) and stir in the simple syrup. Divide your limoncello into bottles, seal, and let them sit for 7 to 10 days to let the syrup marry with the lemon-infused alcohol.
  5. Store your homemade after-dinner drink in the freezer, and serve in pre-chilled glasses or small ceramic cups.

Wednesday, March 29, 2017

Make International Cuisine The Easy Way

Tired of the same old scrambled eggs at breakfast? Looking for a way to add some zing to your meatloaf? Thanks to the good folks at Visual.ly, it is possible to give otherwise bland dishes an international pick-up-me with the use of just three ingredients.

How to Recreate 36 World Cuisines With 3 Spices


Thursday, March 16, 2017

March Break Meals: Dinner

Parents often scramble to find activities for their children to do during the annual week long spring break in the school year. If registering them into a day camp is not an option, this can be a good time to show how to cook some meals. Letting children help with meal preparation is a great way to spend time with them, and it also shows the effort involved in making what is put on the table everyday. Here is a dinner recipe that is easy to make and is something that kids like to eat:

Ingredients: Pizza  
420 g flour
240 mL water
10 g baking powder
5 g salt
1 jar of tomato sauce
sliced or grated mozzarella cheese
your favourite pizza toppings
  1. Preheat the oven to 200 °C. Whisk the flour with the salt and the baking powder. Add the water and let your child knead the dough into a ball, adding more flour a little at a time if the dough is too sticky. Let the dough rest for 15 minutes.
  2. Spread the dough onto a generously floured baking tray, and have your child roll it into the appropriate shape.
  3. Spread tomato sauce over the shaped dough, then add the mozzarella cheese and your pizza toppings (for toppings such as onions and sausage, sauté them first to avoid dealing with getting everything to cook at the same time; this would apply to bacon as well).
  4. Bake in the preheated oven until the pizza base is puffed and golden, about 15 minutes.

    This yeast-free dough recipe can be found in my all-time favourite cookbook, "Cooking for Geeks".

Tuesday, March 14, 2017

March Break Meals: Lunch

Parents often scramble to find activities for their children to do during the annual week long spring break in the school year. If registering them into a day camp is not an option, this can be a good time to show how to cook some meals. Letting children help with meal preparation is a great way to spend time with them, and it also shows the effort involved in making what is put on the table everyday. Here is a lunch recipe that is easy to make and is something that kids like to eat:

Ingredients: Tacos
115 g corn kernels
6 small corn tortillas
5 g ground cumin + pinch for the salsa
3 ripe tomatoes
1 can black beans
1 small onion
1 lime
1/2 red chili pepper
1/2 jalapeno pepper
Handful of torn cilantro (optional)
salt, pepper
  1. Finely chop the tomatoes, onion, both peppers and the cilantro. Cut the lime in half and have your child squeeze out the juice.
  2. Put all chopped up items in a bowl, add the lime juice, salt, pepper, and a pinch of the cumin, and have you child mix everything together.  Cover the bowl with plastic wrap and refrigerate for at least 1 hour.
  3. Open up the can of beans and drain them. Saute them in a skillet together with corn. After few minutes, season it with the remaining cumin, and some salt and pepper.
  4. Heat the tortillas according to the directions on the package. When they are ready, spread a layer of beans and corn on a tortilla followed by some shredded cheese and the fresh salsa.

Monday, March 13, 2017

March Break Meals: Breakfast

Parents often scramble to find activities for their children to do during the annual week-long spring break in the school year. If registering them into a day camp is not an option, this can be a good time to show how to cook some meals. Letting children help with meal preparation is a great way to spend time with them, and it also shows the effort involved in making what is put on the table every day. Here is a breakfast recipe that is easy to make and is something that kids like to eat:
X
Ingredients: C-3PO's Pineapple Pancakes
237 mL milk
75 g unsalted butter
30 g brown sugar
30 g baking powder
7.5 g salt
2 cans of pineapple rings
2 large eggs
  1. Preheat the oven to 120° C. Open up the cans of pineapple and drain off the juice. Set the pineapples aside.
  2. Put the butter in a small saucepan and put it on a burner at low heat in order for the butter to melt. Once the butter has melted, turn off the heat and let the butter cool for a bit.
  3.  Pour the flour, brown sugar, baking powder, and salt into a mixing bowl, and allow your child to stir everything up until it is well mixed.
  4. Break the eggs in another mixing bowl (you know better than me if this is something your kid is capable of doing). Add the milk and about 60 mL of the melted butter and whisk everything until it is well mixed. Slowly mix in the flour mixture until everything is blended - what part(s) you want your child to do here is up to you.
  5. Pour the remaining melted butter in a frying pan and spread it around to coat the cooking surface. Put the pan on the stove and switch the heat to medium-high. When the pan is hot after about a minute or so, pour in some of the batter. Cook the pancake until golden underneath and bubbles burst on the top, about three minutes.
  6. Have your child place a pineapple ring in the middle of the pancake. With a spatula, carefully flip the pancake. Cook until the pancake is golden brown on the second side, about two minutes. Transfer the pancake to a baking sheet, and put the sheet in the oven.
  7. Repeat steps 5 and 6, adding butter to the skillet as needed. Serve the pancakes warm and butter and syrup.
This and other kid-friendly recipes can be found in "The Star Wars Cookbook".

Thursday, March 9, 2017

Q & A with Maverick's Donut Company

Maverick’s Donut Company came about through a collaboration between the partners of two well-known local restaurants, and has made doughnut lovers in Ottawa stand up and take notice.   I had a chance to ask them some questions to Dominic Santaguida, the owner of the business, via e-mail recently, and here's what he had to say, as dictated through his partner Stacey:

FRANKLIN on FOOD: Is it the pastry or the toppings that makes the perfect doughnut?
STACEY SANTAGUIDA: That is of a personal choice, some people like plain donuts, and others like them all dressed up.

FRANKLIN on FOOD: What is it that makes Maverick’s stand out from the other specialty bakers in Ottawa?
SS: First, we are simply a donut shop. we serve beverages, but only donuts, no pastries etc.

FRANKLIN on FOOD: Was it hard to come up with the ideas for your signature doughnuts?
SS: We tried a few different things but really narrowed in down very quickly to the six we currently have with the plan to expand our signatures to many more.

FRANKLIN on FOOD: What was the creation you thought would be in the sweet six but wasn’t?
SS: A key lime donut, we will bring it back in the summer months to test out its popularity then.

FRANKLIN on FOOD: If you could take over a Tim Hortons for a week, what changes would you make, and why?
SS: We would not like to take over Tim Hortons for a week, as their operations are not at all like ours. We do fresh in house donuts only. No sandwiches, breakfast meals, soups or meal type things. We are strictly donuts and coffees/drinks. We aren't a chain either... Nothing wrong with Tim's, just not the same business.

FRANKLIN on FOOD: Other than doughnuts, what’s your go-to sweet treat to eat?
SS: Actually donuts are one of my most favourite things, but most of all I love apple fritters, which we are in the process of perfecting and getting onto the menu.

Monday, February 13, 2017

The Quick and Dirty Guide to Food Aphrodisiacs

People looking to get lucky on Valentine's Day or any other time of the year inevitably start thinking about aphrodisiacs. While there's no known food or drink that stimulates sexual desire (if there was, wouldn't you be eating more of it already?), we do know that certain foods can trigger chemical reactions in the brain to send a flood of happy hormones through the body, which is just as good. Here are some of the more common and uncommon ones:

Arugula - This spicy plant has always been trendy, as it's been considered an aphrodisiac since the first century A.D. It is rich in vitamins A and C, which are essential for sex hormone production. It also delivers many minerals and antioxidants that are important to put the body in its sexual prime. A good source of zinc (excellent for promoting good blood flow to the nether regions), as well as other sex-aiding minerals like magnesium and potassium, arugula is also said to help clear the mind, so while it won't raise you or your partner's sexual energy, it might put the two of you in the right mindset for romance - something to consider for the next salad you order or make.

Red wine - Alcohol has always helped people get to a warm place of relaxation. Red wine is good for vascular health; good blood flow means better orgasms; better orgasms mean better sex. And it's not like you weren't going to order some with your Valentine's dinner anyway. Just remember to enjoy in moderation.

Asparagus - Is having your pee smell funny worth a vegetable's aphrodisiac effect?  The Vegetarian Society says yes, recommending three straight days of asparagus nibbling for the best effects. This long, fibrous shaft is full of nutrients needed for healthy hormone production (vitamin E), and compounds found in asparagus (steroid glycosides) have been known for their ability to promote sexual hormones. It is also a source of folate, which is important for female reproductive health and for the health of sperm.

Maple syrup - There's another reason to head to the sugar bush this season. A great source of manganese (which fights free radicals and is essential to the health of the reproductive system), maple syrup is also a source of zinc, another element that aids in the blood flow (it's also important in the prevention of prostate cancer), and can give the body that quick fix of energy at a key moment.

Chilli peppersBeyoncé has hot sauce in her bag for a reason. Hot peppers contain capsaicin, a chemical that gets the blood pumping to increases circulation and stimulate nerve endings. Just be careful where you're dabbing that stuff, as people have gone to the ER because they got carried away literally spicing things up in the bedroom.

Avocado - The name of this fruit comes from the Spanish word aguacate which ironically comes from the proto-Aztecan word for "testicle" due to the likeness between the fruit and the body part. While this does not mean the word "guacamole" translates to mean "testicle sauce", avocados do contain high levels of vitamin E and potassium which can help in maintaining a high energy level for any activities you care to indulge in.

Oysters - Like all foods of the sea, the oyster's aphrodisiac history can be traced back to the ancient Greeks. They believed Aphrodite, goddess of love, was born of the sea and that all ocean creatures retained some of her powers. Any amorous effect is probably more from the zinc the oysters contain, which is key for testosterone production. With their slightly salty/sweet scent so similar to a potent female pheromone, it's no surprise no less of an authority than Casanova himself allegedly consumed 50 of the bivalves each day to keep his libido up. Please note that there have been recent cases of acute gastrointestinal illness linked to oysters, so be mindful of a few bad hombres out there.

Mangoes - You've always wondered after seeing that "Seinfeld" episode, but there is some basis to the aphrodisiac allure of mango. With its juicy, fleshy texture, and natural sweetness, mangoes are good sources of vitamins A, C, and E, the sex vitamin, the key to virility - it moved for a reason.

Chocolate - Dark chocolate has been shown to cause a spike in dopamine, which induces feelings of pleasure. It also contains flavonoids, antioxidants similar to those found in green tea and red wine, and phenylethylamine, which releases a hormone that occurs during sexual intercourse. This may explain why a box of chocolates is the standard Valentine's Day gift, no matter how much of a cliche it has become.

Hemp - The aphrodisiac effects of hemp lay more in the area of cannabis and hashish, but hemp seeds are rich in the Omega-3 fatty acids, useful in improving mood, as well as a good source of vitamin E (aka the sex drug). As a friendly reminder, please remember that any other hemp delivery methods you know of may not be legal yet.

Ginkgo Biloba / Ginseng - People have been fascinated by ginkgo biloba and ginseng for centuries, with both claiming improvements in cognitive abilities and libido; it works on both heads if you will. Ginkgo supposedly increases blood flow to the brain as well as to the nether regions, along with increasing dopamine and adrenaline. Along with being phallic, ginseng root is commonly used as a healing agent to treat fatigue, reduce stress, fight infection and cure impotence. Stamina and quick bursts of energy are useful in any horizontal jogging; your results may vary.

24 Hour Perogies

In a place known as the City That Fun Forgot, it's no surprise that there's not much happening in Ottawa late at night. The House o...