Showing posts with label BBQ. Show all posts

Thursday, March 30, 2023

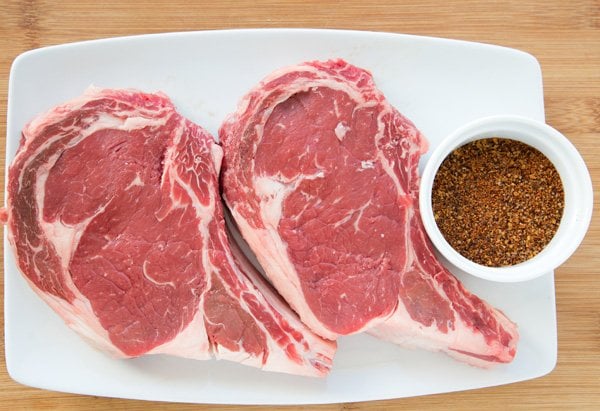
Cowboy Up Your Steak

You can tell who takes their grilling seriously by whether or not they barbeque year-round. For some people, a little snow and ice aren't enough to keep them from cooking meat over an open flame. Even if you're one of those people who prefer not grilling in subzero temperatures, you will want to have some cowboy butter on your next steak. Adding butter to steak adds richness and can soften a steak's charred exterior, making the meat more tender. Cowboy butter is great for grilled meats, perfect for chicken and fish, and can be stirred into rice or cooked pasta, or spread on crusty French bread or cornbread. So rustle up yourself some, little dogie.

Ingredients
85 g butter, melted (grass-fed butter if possible)
21 g parsley, fresh chopped
21 g chopped chives, fresh chopped
15 g Dijon mustard
12 g minced thyme
1.5 g crushed red pepper flakes
1.5 g teaspoon paprika
4 cloves garlic, minced
juice and zest of half a lemon
salt
black pepper, freshly ground if possible
cayenne pepper
  1. In a small bowl, combine the melted butter, lemon juice, garlic, mustard, paprika, and a pinch of cayenne pepper. Whisk the sauce to combine everything.
  2. Stir in the parsley, chives, crushed red pepper flakes, lemon zest, and thyme, and season everything with salt and pepper. For a thicker butter sauce, add more mustard.
This recipe can also be made into a solid piece of cowboy butter by using a stick of softened butter instead of melting it:
  1. Place the softened butter in the bowl of a mixer fitted with a paddle attachment. Whip the butter until it's fluffy. Add the remaining ingredients and mix everything until it's completely combined, scraping the sides as needed.
  2. Lay out a long piece of plastic wrap and scoop the butter mixture in a long strip down the middle of it. Carefully pull one side of the plastic wrap over the butter, squeezing it gently to form it into a log. Continue to roll the log of butter into a roll. When it's all rolled up, twist the ends (like a piece of candy) until they become very taut (this means the butter is pressing together inside the plastic to form a cohesive roll). 
  3. Place the roll of butter into either the fridge or the freezer so it will harden.

Wednesday, July 27, 2022

Better Than Ribfest Ribs

If you want to enjoy some ribs during the summer, there's no reason to wait until the various rib fests start popping up. As it turns out, all those vendors you assumed were coming to town from the U.S. to let you sample their grilled meats are all owned by the same Canadian company.  The only thing that makes any of the food taste different from each other is the sauce they use on the meat and sell to customers. They all use the same cuts of meat and they all cook the meat in the same way - whatever regional style they claim to be using, they're not. None of those trophies displayed mean anything; any first-place awards should be taken with a large serving of salt. Even the southern accents you hear from the people working the grill are fake. If you want to avoid the artificially long lineups (once vendors have people waiting for food, they work slower to build the line to build a buzz) try the recipe below. When it comes to BBQ ribs, slow-and-low beats fast-and-fake every time.

Ingredients
2 racks baby back pork ribs
180 mL apple juice
60 mL apple cider vinegar
30 g light brown sugar
15 g cayenne pepper
10 g smoked paprika (optional)
7.5 g salt
5 g granulated garlic
5 g dried minced onion
5 g ground mustard
2.5 g black pepper
your favorite BBQ sauce
  1.  Turn all the burners on your gas grill to low. Leave the grill covered and let the temperature rise to 150°C.
  2. Remove the silverskin off the back of the ribs by sliding a table knife under the membrane anywhere along the rack. Lift and loosen it with the knife until you can grab it with a paper towel, then pull it off the ribs. This will allow the seasoning to get to the meat giving it more flavour.
  3. Mix all the dry spices together in a small bowl. Rub the spice blend over both sides of the ribs.
  4. Pour the apple juice and the apple cider vinegar into a large foil pan. Place the ribs in the pan and cover them tightly with aluminum foil. Place the pan on the grill, cover and close the grill, and let the ribs cook for 60-90 minutes.
    • This can also be done by placing the foil-wrapped ribs in an oven preheated to 121°C for 2 hours.
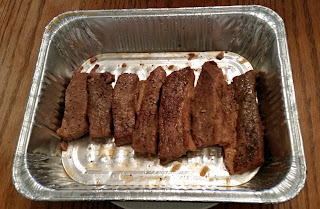
  5. When the internal temperature of the meat reads between 73-76°C, carefully bring the foil pan inside. Remove the ribs and transfer them to a large baking sheet, then slather each side of the ribs with your favorite sauce.
  6. Increase the heat on each burner of your gas grill to medium/high. Grill each rack for about 5-7 minutes per side, adding more sauce as needed. You will know when the ribs are done when the ribs start to slightly char.
  7. Let the ribs rest for 5 minutes before slicing and eating.

Saturday, October 31, 2020

Better Bacon

We all know that the love people have for bacon borders on obsession. But what is the best way to prepare the salt-cured pork belly everyone craves? Inspired by a feature on Cooking for Engineers, I tested several different cooking methods and compared the results. As it was on sale at the time, I used Schneiders Classic Cut brand bacon for the tests. Each piece of bacon was rated out of five, with five being excellent, and a score of one being inedible. Assisting me with the tasting part of the experiment were the other bacon eaters in the house, my wife Dawn Xanklin, and our son, a fourth-grade bacon connoisseur.

Baked on Aluminum Foil
I placed enough aluminium foil to line a baking sheet, then I put the bacon on top, and baked it at 205°C until it was done to my liking, flipping the bacon occasionally.


Cooking Time: 17 minutes + 17 minutes for oven to reach temperature = 34 minutes
Scores: Franklin on Food: 5 DXanklin: 4 Kid Franklin: 5

Cast Iron Skillet
For this I placed the bacon in a cold cast iron skillet and cooked it at medium heat, flipping the bacon occasionally until it looked good enough to eat.


Cooking Time: 11 minutes
Scores: Franklin on Food: 4 DXanklin: 4 Kid Franklin: 4

Grilled
I put the three strips on some aluminium foil and placed it over two burners on a BBQ at high setting.


Cooking Time: 17 minutes
Scores: Franklin on Food: 4 DXanklin: 5 Kid Franklin: 5

Instant Pot
The bacon was made to fit in a single layer in the Instant Pot cooking chamber. Then I hit the Saute button and cooked everything for three minutes intervals, flipping the bacon before hitting the button again.


Cooking Time: 9 minutes
Scores: Franklin on Food: 3.5 DXanklin: 4 Kid Franklin: 5

Microwave
I took three slices of bacon and placed them on three paper towels on a dinner plate, which I then I put into my microwave oven.


Cooking Time: 3 minutes on high, then cooked 30 seconds until it was done to my liking = 4.5 minutes
Scores: Franklin on Food: 3 DXanklin: 3 Kid Franklin: 5

Water in Skillet
After arranging the bacon in a cold metal frying pan, I added just enough water to cover everything. I then cooked it over high heat until the water boiled, lowered the heat to medium until the water evaporated, and then continued cooking the bacon over medium-low heat until it was ready.

Scores: Franklin on Food: 5 DXanklin: 5 Kid Franklin: 5
Cooking Time: 14 minutes

Notes and Observations:
The overall favourite was the one I was the most skeptical about, the water in the skillet method. It's the method the food scientists over at America's Test Kitchen recommend, as they theorize that the water keeps the cooking temperature low and gentle, allowing the bacon to retain its moisture and stay tender. This gave the bacon a nice ratio of crispiness and chewiness. While it does let the bacon cook in its own fat, the oven is not the most efficient way to cook a small amount of bacon, and it takes the longest of the methods tried. It's much better for larger amounts. Instant Pot bacon isn't an option if you don't have the all-in-one wonder device and barbeque grilled bacon may not be an option if you don't have the equipment or the desire to cook outside. It doesn't get more old school than cooking bacon in a cast oven pan, and while you can't beat the speed of a microwave, it did produce the least liked bacon of the tests. To see which way works best for your bacon needs, you will have to try each method on your own. If you do decide to try this experiment, please note that cooking this much bacon at one time will make the area around your kitchen smell amazing.

Sunday, June 28, 2020

Adventures in BBQ: Pork Shoulder

For my birthday this year, my wife got me a compact vertical charcoal smoker/grill. I finally got a chance to try it out when I smoked a pork shoulder roast recently. Here are some observations on how it all came together:
  • Like my favourite Arlen, Texas resident, I've always used propane and propane accessories, this is the first time I've ever used a charcoal grill to cook.
  • I wasn't crazy about having to assemble my birthday present, this grill definitely has more moving parts than the box smoker I made a few years ago. The build went OK, took about a half-hour. I can't stress enough - always read and re-read the instructions when putting something together. If I hadn't, I would have put the charcoal in the ash pan instead of on one of the grills - oops.
  • This smoker uses a water pan to prevent any fat from dripping onto the coals and helps regulate the temperature by adding some humidity. Hopefully, I don't douse my coals by accident during the cook.
  • Getting a charcoal chimney to light my briquettes was a smart move on my part. 
  • According to Jaime Purvuiance's "Weber's Way To Grill", the roast needed to be cooked with indirect heat, so around lunchtime, I got my briquettes lit, spread the coals on one side of the grill, and put the pork shoulder with the rub I applied to it earlier on the other. I wish I had grabbed some wood chips when I bought the briquettes; hickory or oak seems to be good all-purpose choices.
  • It was threatening to rain all afternoon, with it spitting from the sky intermittently. Today's beer of choice: Pabst Blue Ribbon 5.9%,  a fine utility beer, one of the few cheap American beers that taste like actual beer.
  • About 30 minutes in, I noticed my temperature was dropping because I didn't use enough charcoal. Keeping this grill at the 200-250 degree sweet spot on the temperature gauge will be the constant challenge, I had no idea how much I took the ease of propane for granted.
  • Mental note, I need to buy a bucket for the ashes and something to move around the coals. A pair of heat-resistant gloves would also be nice in hindsight; no burns but why take the chance, right? 
  • You know you're on the right track when your wife and your neighbour ask where that great aroma is coming from.
  • Even though I let a 2 kg roast cook all afternoon,  I still checked to see if it was at temperature. The end result had a nice colour on it, and while the meat wasn't fall off the bone tender, it still made some damn tasty sandwiches.
  • Overall, not bad for a first attempt. With the goal of smoking a beef brisket by the start of fall, it looks like I'm going to be spending the rest of the summer getting to know my new smoker.  This is a sacrifice I'm willing to make.

    Pork shoulder


Friday, April 5, 2019

Better Steaks With Meaty Food Hacks

After a winter that refuses to let go of its grip on the city, grillmasters are chomping at the bit to fire up their barbeques. With the chance of snow or rain constantly looming in the forecast, you may want to treat yourself to a dry-aged steak when you finally do get to cook outside.  Dry-aging removes moisture from a piece of meat and causes a breakdown of the muscle tissue - basically, this process causes your steak to decompose. As disgusting as this process may sound, it also tenderizes the meat, and gives it an amazing flavour. Aged steaks can be bought, or be made at home, but while you're waiting for the snow to melt, or the backyard to dry out in order to get to your grill, you can experiment with these cheaper and faster food hacks.

Mushrooms

Chefs who don't have the time to wait 30+ days for that extra burst of umami suggest you season your steak with mushroom powder. Get some dried porcinis or shiitakes and grind them up using a food processor or blender, then season your steak with it, along with some salt and black pepper. Wrap everything in plastic wrap and let the steak sit in the refrigerator until you're ready to cook it.

Koji
Koji is a rice grain that has been introduced with a live culture and is used in the making soy sauce and miso paste. When koji is added, the live culture helps break down the carbohydrates, amino acids, simple sugars, and proteins.  If the live culture is used to break down beans, it stands to reason it can be used to break down the connective tissue in your steak. As with the dried mushrooms, you will need to turn the koji (check your favourite Asian supermarket or order some online) into a powder and rub it all over your steak. Once that's done, put the steak on a plate and place it in your refrigerator for three days. This will cause your meat to become fuzzy in appearance, and leave a pungent smell in your fridge so you may want to place your steak in the crisper if you don't want to deal with the smell, or in a separate refrigerator like your beer fridge (give the fridge good cleaning while you're at it). After three days, rinse all the koji from the meat, pat it dry, and then season it with salt and pepper as normal.

Fish Sauce
This hack takes longer than the others but is one used by Nathan Myhrvold of "Modernist Cuisine" fame, so you know it's legit.  Place your steak in a Ziploc bag, pour in about 15 mL of fish sauce per steak to coat the meat, then seal the bag as tightly as possible, getting out as much air as you can; if you have access to a vacuum sealer, now would be the time to use it. Put the meat in the refrigerator for three days. Take the steak out of the bag, wrap it tightly in cheesecloth, then put it back in the fridge for another three days. Season the meat all over with salt and pepper when it's time to cook.

Blue Cheese
As good as fish sauce is for replicating the rich funky flavour of an aged steak, blue cheese can also be used. Lay a sheet of plastic wrap on a baking sheet, then place an equal-sized piece of cheesecloth on top. Place your steak on the cheesecloth. Fold a thin layer of the cheesecloth over the steaks, then top with some crumbled blue cheese. Fold over the plastic wrap to secure the cheese on top, then refrigerate the wrapped steaks overnight. When it's time to cook,  unwrap the steaks, take off the blue cheese, and pat the steaks dry with paper towels before seasoning both sides of the steak with salt and pepper. You now have steak that is ready for cooking and some blue cheese to use in a sauce for them when it's time to eat.

Ingredients: Blue Cheese Sauce
180 mL heavy cream
35 mL Worcestershire sauce
140 g blue cheese
15 g unsalted butter
1 shallot, sliced
3 g kosher salt
3 g coarsely ground black pepper
  1. In a small saucepan over medium heat, melt the butter. Add the shallots and cook until golden brown, about 2 to 3 minutes.
  2. Stir in the cream and Worcestershire sauce and cook for another minute. Add the salt, pepper and blue cheese and stir well. Just as the cheese begins to melt, remove from the heat.

    To serve, spoon the sauce over the steaks or whatever else needs blue cheese added to it.

Friday, September 15, 2017

The Cardboard Smoker Box Ribs Experiment

With rib festivals happening numerous times throughout the year over the city, Ottawa's love for grilled meat has been well established. In honour of the Orleans Ribfest, I decided to try making some pork ribs using the cardboard smoker box method popularized by the cooking world's mad scientist Alton Brown.

Build Materials:
cardboard box (big enough to hold a BBQ grill in, but not so big it will take forever to heat up, something under a metre high and at least 60 cm.wide)
2 wooden dowels
BBQ grill
aluminum foil
aluminum pie pan
hot plate
old frying pan
wood chips
probe style cooking thermometer
small fan (optional)
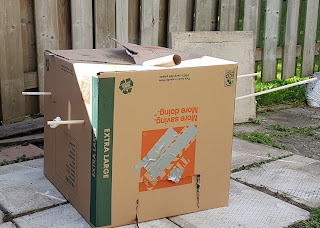
I lined as much of the inside of the box with aluminium foil as a safety precaution.

I then cut a hole in the bottom of the box as shown below, in order to make access the wood chips easier during cooking.

Because the food needs a place to be cooked on, I inserted the wooden dowels through the box and placed the grills from my propane BBQ on top.


When it was time to start cooking, I hauled everything up from the basement, and set it up outside, placing the hot plate in the centre of the box through the hole in the bottom. I soaked the wood chips as instructed on its packaging, and then filled the frying pan with the wood chips. Placing the frying pan on the hot plate, I topped it with a pie plate with holes poked through the bottom, allowing the smoke to fill the box while protecting the burner from any juices that drip from the meat. I then plugged the hot plate into an outlet and turned it on. If you have a small fan, you place it in a corner of the box away from the hot plate so it can circulate the hot air and the smoke throughout the box, but don't be surprised if the fan runs out of power, or shuts down during the cooking process as mine did.

The night before, I prepared the pork ribs. For the rub, I went with a recipe from my go-to BBQ reference, "Weber's Way to Grill: The Step by Step Guide to Expert Grilling".

Ingredients: Rub
45 g kosher salt
30 g chile powder
30 g light brown sugar
30 g garlic salt
30 g  paprika
20 g dried thyme
20 g ground cumin
20 g celery seed
10 g black pepper (freshly ground if possible)
  1. Mix all the ingredients together in a bowl. Season the ribs with rub you created.
I placed the ribs on the grill bone side down, and then closed the box up to allow it fill with smoke. I had to be careful as the box got warm to the touch quickly About every half-hour or so, or whenever I saw less smoke coming out of the box, I carefully checked on the wood chips in the frying pan,  dumping out the burnt up wood in a fireproof container, and adding more wood chips, and adjusting the temperature control on the hot plate as needed.

YOU ARE DEALING WITH FLAMMABLE OBJECTS ENCASED IN A FLAMMABLE OBJECT - DO NOT LEAVE THE SMOKER BOX UNATTENDED!

Knowing the ribs will take at least 4-5 hours to cook, I did some yard work in the backyard, then enjoyed a few of my favourite IPAs while watching the pilot episodes of "The Defenders" and "G.L.O.W." (I liked the former more than the latter) and some "Lucha Underground" on Netflix while watching the ribs cook. Every hour or so I flipped the ribs to make sure they were evenly cooked, and sprayed them with the following liquid to keep them moist:

Ingredients: Mop / Spray Bottle liquid
240 mL apple juice
120 mL apple cider vinegar
30 mL Worcestershire sauce
  1. Combine the ingredients in either a spray bottle or a bowl if you prefer using a BBQ mop.
After several hours of smoking, I finished the ribs on my BBQ so my hungry family could get their dinner. The ribs tasted great, tender and flavourful, I was surprised by how much smokiness I got on the meat. I may not win any grilling competitions with this method, but it's not bad for something you can make with stuff you may already have lying around your house, and it's something to try in between ribfests while drinking beer in the great outdoors.

Friday, May 19, 2017

Q & A with John Thomson, BBQ Instructor and Canadian BBQ Champion

Most people on the long weekends are down for firing up the ol' BBQ and throwing on some meat to grill, but John Thomson takes his barbecuing a lot more seriously. When he's not working as an IT professional, he's competing in BBQ competitions, as well as teaching people about the finer points of BBQ cooking. I had a chance to ask him some questions via e-mail recently, and here's what he had to say.


FRANKLIN on FOOD: What's the difference between the barbecuing you do, and the steak and burgers I'm cooking on my grill?
JOHN THOMSON: What Canadians typically call "BBQ" is actually more commonly known as "grilling". This is the technique of cooking hot and fast, alternating between direct and indirect cooking.  It's what most of us started doing, and usually on a propane gas grill.

What we do is more traditional BBQ.  That is, low, slow and usually cooking indirectly, often in a smoker with temperatures ranging from 200 - 250 degrees F.  For instance, a pork butt we might cook for 12 - 18 hours in order to get the fat and connective tissue to render down and resulting in soft, juicy and flavourful meat.

Both are legitimate and popular cooking techniques.  Some BBQ competitions actually have a grilling contests too.

FoF: Is what's cooked at RibFest true BBQ?
JT: That's a great question.  The quick answer is, "Yes, it often is".  Now, it may not be low and slow for 6 hours or more, that just isn't practical given the volume of food those vendors have to turn out at a Ribfest.  But most is cooked on big commercial smokers, slathered in sauce and they make plenty of it.

FoF: How did you get interested in this style of cooking?
JT: I started with a pellet smoker, after my buddy bought one and cooked a prime rib and some bacon-wrapped, cheese-filled jalapeños.  I was hooked right there and then.  You just cannot beat the taste, the textures, and the smells from a long and slow cook.  And bacon?  Come on...

I bought mine and immediately started figuring out ribs.  You see, I once boiled ribs based on the advice of my Dad.  I couldn't eat them, I was so grossed out by the brown and gray foam in the pot.  But when I got my pellet cooker, I worked on ribs for a good year before being pleased.  I entered and won my first BBQ Competition with those ribs, and 8 years later, I still cook that same recipe, and I still win a fair amount with those ribs.

FoF: Do you think BBQ gets its due as a way of cooking?
JT: I think that, in Canada, it is starting to gain respect as a true form of cuisine, and not just something that happens on the back deck with a beer in hand (not that there's anything wrong with that!) for 2 months of the year.  With more BBQ supply stores opening or growing like Capital BBQ and several new BBQ restaurants opening, I would say that this is reflective of an industry that is really growing in Canada.  It helps having a good selection of quality BBQ restaurants, as this is how most of the public is introduced to this style in the first place.

FoF: Gas or charcoal, what's the better grill?
JT: Gas is fast, easy and hot.  That's why most people are drawn to it.  Sadly, many don't realize that charcoal is easy to use and the results are inarguable better.  Using a good quality charcoal, it is incredibly easy to build and maintain a cooking area that is perfectly suited for the dish.  Throw in a chunk of wood like hickory, cherry,maple....and the results are even better.
I do not own a gas grill.  I can get my Kamado style ceramic cooker, blazing hot in minutes.  Or I can maintain a low heat in order to add some some flavours.

All that to say: Charcoal is better, in my opinion.

But there are other options we shouldn't discount, such as a pellet cooker that works with a digital controller where you set the target temperature and let technology do all the work for you.  A great entry-level cooker, and an easy way to make great foods.

FoF: What's a good starting meat for beginner BBQers?
JT: When starting out, and learning your cooker, you will want to try a meat that is forgiving and not terribly expensive.  Pulled pork is perfect for this.  Using the right cut of pork, the "pork butt" (a part of the shoulder, named after the barrels or butts, they were shipped in, not an anatomical reference.), all a new cook has to really do is make sure they cook it to an internal temperature in the 190 - 200 degrees F range and that's it.  This allows cooks to experiment with flavours, temperatures and rubs without worrying too much about perfect the meat itself. After that, people tend to drift towards ribs and then they have their eyes on beef brisket.  But, I like to advise people to walk, then run.  Learn your cooker, get comfortable and above all:  HAVE FUN.

FoF: What's the number one mistake people make when BBQing?
JT: Cooking too fast, with too much heat.  Many people are surprised by how much cooking power you can get out of a small amount of charcoal, so they tend to fill their charcoal bowls, get it fired up and then burn their foods up.  A little goes a long way!

FoF: There are various American regional styles of BBQ, are there any Canadian regional styles that you're aware of?
JT: Most Canadians are drawn to the sweet and sticky BBQ which is very common in the Kansas City region.  But we are starting to see a rise in Texas BBQ coming to Canada, at places such as Adamsons in Toronto or Meatings in Ottawa.  Food that is cooked with a minimal of complex flavoured rubs, and often without sauce on the meat.  This allows the flavours of the smoke, the wood, the meats to all come together for an incredible experience.  I am very happy to see this style on the rise up here.

FoF: Is there a BBQ style that you prefer, and why?
JT: I like it all.  Sweet, spicy, mustard, tangy.  I just don't much care for vinegar sauces.  I've never had a pallet for vinegar, so that North Carolina style kind of throws me off a bit.  But otherwise, bring it on!

FoF: If you're not cooking it, where's a good BBQ place in Ottawa, and what do you order?
JT: There are a few great spots in town, we are very lucky in Ottawa these days!  Out West I like to visit Red Shack BBQ on Carp Rd.  It's exactly what it sounds like: A little red shack with big BBQ flavours.  In the Market area, Fatboys Southern Smokehouse is a fun and vibrant place with a wide variety of unique takes on some standard fare.  In the east, you can not beat the newcomers at Meatings.  They operated a BBQ catering business in Ottawa for 5 years before opening this restaurant.  It's a cozy spot in Orleans and their brisket (ordered "fatty" for more flavour) and ribs are unparalleled in Ottawa.

FoF: How did you go from grilling for trophies to teaching at Canada's BBQ School?
JT: I have been teaching BBQ Clinics at Capital BBQ for about a year now, and while that allows me to teach backyarders of all walks.  It's a ton of fun.  But the BBQ Classes that I offer through BBQClass.ca is more aimed at people who are considering entering the world of Competition BBQ, or existing teams looking to up their games, or anyone who wants a taste of a different aspect of BBQing.

FoF: How many hours go into planning all the details when someone enters a BBQ tournament?JT: All of them.  LOL!  As a cook, I plan and plan.  I make lists and then lists of lists.  I Practice, I test, I tune and I record everything.  But that's me.  For anyone new thinking of entering a contest (such as the Capital BBQ Festival being held this Aug 4 - 6 at the Carp Fairgrounds), there are a great amount of resources available to them, to help get started.  First off, I would point them to the Canadian BBQ Society, a non-profit organization who organizes all of the Teams, Judges and Organizers in Canada and promotes BBQ Competitions from coast to coast.  They have a very active Facebook chat page as well as packing lists and advice of all kinds for anyone considering this.
Additionally, becoming a "Certified BBQ Judge" is a great way to learn what the judges are looking for when you serve your dishes.  Many cooks are also judges for this reason.  There is a Certified BBQ Judge Class being offered on August 4th at the Capital BBQ Festival.

FoF: What will be some of the highlights at this year's festival?
JT: With demos, bands, vendors and a beer garden, this event is unlike anything Ottawa has ever seen before. We have a HUGE focus on engaging the General Public at this event.  3 of our events are actually judged by the general public!  Friday from 6 - 7 PM is our People's Choice Chicken Wing Contest.  25 Pro BBQ Teams will be cooking up Wings for the public to sample, and then they text their votes to help us determine the winners. Saturday we are hosting a Charity Ribfest where we sell Judges Seats and the teams are cooking their best BBQ ribs for the judges to sample and vote on. Sunday from 2 - 3 PM is our People's Choice Pulled Pork Contest.  Same idea but this time the public gets to sample authentic competition grade pulled pork!

All funds raised from these events will be directed to our charities.
Monday, June 6, 2016

Common Sense BBQ Tips

It's that time of year when people leave the confines of the kitchen and go do some cooking outdoors. If you are about to fire up the barbeque for the first time or plan to make the most of your grill, here are some grilling tips to help make things go more smoothly this BBQ season:
  • Make sure you have extra charcoal or propane. Seems obvious, until you can't get your fire started, or when your fire goes out.
  • Take your meat or fish out of the fridge at least two to three hours before putting it on the grill if you don't want to deal with your food being cold on the inside.
  • Mise en place isn't just for indoor cooking. Have your BBQ tools - tongs, spatulas, a sharp knife, basting brushes, fire extinguisher - cleaned and nearby before you head outside.
  • Using a gas grill? Let it heat up for at least 10 minutes. Got yourself a charcoal grill?  Let it heat up for at least 20 minutes.
  • If you’re using a charcoal grill, empty the ashes from your last grilling session. Check the grease tray as well for gas grills.
  • Use only one cut of meat or fish. It's hard enough to get the right cooking temperature for one cut of meat, let only several.
  • Go with lump charcoal if you want the best smoky flavour. Don't fret if you have a gas grill as you can still get some of the smoky flavour from the fat of the meat cooking at high heat if you don't have a smoker box.
  • Don’t light your charcoal with lighter fluid. It's a fast way to start the fire, but it can make your food taste funny.
  • Create gradations of heat on your barbeque by stacking your coals asymmetrically once they are hot. By doing this, you can move things that are charring on the outside across to the cooler part of the grill. Always keep an area of the grill with no coals under it at all – a place to rest food that is cooked and to move things to if you have a flare-up.
  • Avoid squirting water on the flames when things flare up, as this will send ash flying over your food. Try moving the food over the part of the grill with no coals underneath it instead.
  • If you are nervous about getting it right, use a meat thermometer to check it your meat is done. To make sure your meat is cooked to the right temperature, this is a link to a temperature cheat sheet.
  • If you have any leftover marinade, cook it up on the grill in a metal bowl to kill off any bugs. or pour it over the cooked meat as a sauce.
  • Consider rubbing in a separate marinade after you have cooked it. Barbecued fish is delicious if rubbed with very finely chopped parsley and garlic in olive oil. When cooking meat, smear some butter blitzed with herbs, salt, pepper and garlic on top of a chopping board. Place the cooked meat on the butter so it can melt and soak into the meat as you carve it.
  • Be lazy and don't clean your barbecue after use. If you leave the fat on the grill, it will prevent rust from forming. To clean it, get your grill nice and hot and then rub the charred debris off with a coarse wire brush.

Tuesday, August 25, 2015

Slow Cooker Brisket

Franklin on Food - Slow cooker brisket
At some point if you watch enough BBQ shows on TV, you're going to want to cook a brisket. This is the problem that presents itself to me. Though it's considered the holy grail of barbecuing, brisket can be cooked many ways. By far the most popular way is by cooking it slowly over indirect heat from a wood fire. By smoking the meat, the smoke from the wood and the burnt dripping juices further enhance the brisket's flavor, along with marinating the meat, or rubbing it with a spice rub. Brisket done this way is popular in Texas; once finished, pieces of brisket can be returned to the smoker to make burnt ends, which are popular with fans of Kansas City-style barbecue. It can even be featured as a main course option in a traditional New England boiled dinner. But as a New York Jets fan, I don't care much for anything that comes out of New England. Because I also don't own a smoker, I'm going to use my slow cooker to break down the connective tissue in the meat to make it taste good. Aaron Franklin of Franklin Barbecue fame may consider what I'm doing sacrilegious, but the grilling the brisket will get on my gas grill while I'm grilling up some vegetables to go with this meal will have to do. I'll make it up to him the next time I'm in Austin, TX.
Ingredients  
beef brisket (I used about 750 g from a beef brisket pot roast cut in strips)
1 284 mL can beef broth
1 284 mL can beef consommé
1 packet of onion soup mix
  1. Heat a cast iron skillet over medium heat with some olive oil. While the pan is heating up, take the brisket out of its packaging and pat it dry. Season the meat generously with salt and pepper. 
  2. Sear the brisket until a golden brown crust appears on both sides of the meat. Remove and place the meat in the slow-cooker, fatty side up.
  3. Pour in the beef broth, the beef consommé, the contents of the soup packet, and 284 mL of water. Cover and cook in the slow cooker on LOW for 6 to 8 hours or until the brisket is very tender. 
  4. Let the brisket rest for at least 20 minutes before serving in the slow cooker set on the "warm" setting, or transferred to a baking dish and covered tightly with aluminum foil while resting. The meat can be served with its juices.

Thursday, June 4, 2015

Friday, May 15, 2015

The Truth About Beer Can Chicken

The Victoria Day weekend is usually when the first big BBQ of the year happens. Along with hamburgers, hot dogs, planked salmon, and grilled vegetables, a popular food at these cookouts is beer can chicken. Perched on your favourite can of beer, and covered with an herb rub, the chicken is cooked on the grill, giving it a nice roast on the outside, with the inside bathed by the steam of the beer, keeping the meat moist. Or so we are told. Not only are there better ways to cook a chicken on the grill, the entire concept of beer can chicken is little more than a waste of beer. And nobody wants to do that on a long weekend.

To be fair, there is a reason people love the taste of beer can chicken, it does a lot of things right. The chicken is exposed to convection heat so it can crisp the skin on all sides, and because the legs aren't tied together, the dark meat can be exposed to more heat and finish a bit hotter than the thicker breasts. But the cooking method used leaves a lot to be desired. The can prevents the chicken from cooking on the inside. With a metal can shoved up its butt, warm air cannot enter the cavity of the chicken from below, and only a small amount can enter from above through the neck cavity. All the heat must enter the meat from the outside. Because meat doesn't heat evenly, it progresses inward from the part in contact with air, making the outer parts warmer than the inner parts. By the time the meat nearest the cavity hits 74°C, the outer layers are in the 82 to 88°C range. That may darken and crisp the skin a bit more, but it makes the outer layers drier.

And contrary to what the recipe being used says, the beer doesn't add moisture or flavour to the chicken. Because beer is about 90% flavorless water, and 5% flavorless alcohol, all the flavour compounds are at most 3.5% of the weight. In a 355 mL can of beer, that's about 1 teaspoon of stuff with flavour; even if you add herbs and spices to the beer, their flavour compounds don't dissolve in water. Finally, there are the safety factors. If you forget to open the can, it can explode; hot fat from the drip pan may burn you; the drip pan might catch on fire, burning the bird; removing the bird from the can is a pain, because the can usually sticks to the chicken during cooking; the ink on the outside of the beer can (and the widget in that can of Guinness) probably isn't food grade and may seep into your food. There's enough here to make you reconsider even lighting your grill, but if you're like me, you're still going to make and eat beer can chicken. Because you like cooking it this way, and you like how it tastes when you do so. Sometime in the future, I'll try grilling a butterflied chicken (removing the backbone, flattening it, cooking it skin up on the indirect side, and then flipping it skin down on the direct side for a few minutes), or adding a rotisserie attachment to my BBQ. Until then, here's the recipe I use for beer can chicken:
Ingredients
1 1.81 kg. whole fryer
1 355 mL can of beer
240 g butter
30 g. garlic salt
30 g. paprika
salt and pepper
  1. Preheat your BBQ for low heat.
  2. In a small pot on the stove, melt the butter. Add the garlic salt, the paprika, and salt and pepper, to taste. Mix together, and let simmer at low heat.
  3. Open the beer and drink half of it. Check to see if the neck and giblets have been removed from the cavity of the chicken, remove them if you find them. Baste the chicken with the melted seasoned butter. Either pour the remaining butter in the beer can or save it for further basting as it cooks; the choice is yours.
  4. Position the chicken in the way your beer can apparatus recommends you to; if push comes to shove, lower the chicken on to the open can, so that the chicken is sitting upright, with the can in its cavity, and place the chicken on the grill, using the legs and beer can as a tripod to support the chicken on the grill and keep it stable. Cover the grill and let the meat cook for about 45 minutes.
  5. Check the chicken every 15 minutes or so, until a meat thermometer inserted into the thickest part of the thigh reads 74° C.
  6. Let the chicken rest for 10 minutes. Carefully lift the chicken off of the can. If it gets stuck, lay the chicken on its side, and pull out the can with tongs.

Thursday, April 4, 2013

Where's the Beef? Oh There It Is...

Ever wanted to know what part of the cow your favorite cut of beef came from, but were too shy to ask the butcher at where you shop? Wonder no more, thanks to this handy guide from the good people at Visual.ly. It comes in handy if you want to know how to cook a particular cut of meat, and gives a general idea on how much that cut will cost. Let the BBQ season commence!


Festive Holiday Baking

Are you a hybrid worker being forced to attend an office potluck?  Do you need a dessert for your child's Christmas bake sale?  Feel l...