In one of the most anticipated restaurant openings in recent memory, my hometown now has its very own Chick-fil-A restaurant. While my son and I have been looking forward to seeing if the hype about this place and its chicken products is worth it, my wife doesn't share our enthusiasm. After learning the company donated to anti-LGBTQ groups and what the company CEO said about same-sex marriage, my wife decided Chick-fil-A would never get any of her money. Many other people share this sentiment, and it will be interesting to see if this boycott will affect sales here. In Chick-fil-A's defense, the backlash and criticism they have received have caused them to stop giving money to some (but not all) of the controversial groups that people opposed. They have since pledged to donate to Black-led non-profits or those serving the Black community in the U.S.; to mark the opening of the new Ottawa restaurant, Chick-fil-A plans to donate $34,000 to a local non-profit organization through Second Harvest. And for what it's worth, the claim that Chick-fil-A broke a promise to stop donating to anti-LGBTQ groups is just fake news that came out after the company pulled funding from the Salvation Army and the Fellowship of Christian Athletes after Chick-fil-A decided to change the areas of focus for their charities. I feel I can support the LGBTQ community and Chick-fil-A the same way I go to non-unionized Starbucks while being in a union. Distance will be the deciding factor on whether or not I ever eat from Chick-fil-A. I remember the long waits at Popeyes when they came to town. I'm not driving an hour, waiting an hour, and driving another hour back for a fried chicken sandwich anytime soon. Eating at Chick-fil-A doesn't automatically make you a homophobe any more than liking Kanye makes you an anti-Semite. I can understand why others may feel differently. In the meantime, I'll make do with the FCS I've been making for the times I don't want to go out to eat. I'm sure Chick-fil-A will be a huge success with or without my participation.
Showing posts with label chicken. Show all posts
Showing posts with label chicken. Show all posts
Thursday, July 18, 2024
Thursday, March 30, 2023
Cowboy Up Your Steak
You can tell who takes their grilling seriously by whether or not they barbeque year-round. For some people, a little snow and ice aren't enough to keep them from cooking meat over an open flame. Even if you're one of those people who prefer not grilling in subzero temperatures, you will want to have some cowboy butter on your next steak. Adding butter to steak adds richness and can soften a steak's charred exterior, making the meat more tender. Cowboy butter is great for grilled meats, perfect for chicken and fish, and can be stirred into rice or cooked pasta, or spread on crusty French bread or cornbread. So rustle up yourself some, little dogie.
Ingredients
85 g butter, melted (grass-fed butter if possible)
21 g parsley, fresh chopped
21 g chopped chives, fresh chopped
15 g Dijon mustard
12 g minced thyme
1.5 g crushed red pepper flakes
1.5 g teaspoon paprika
4 cloves garlic, minced
juice and zest of half a lemon
salt
black pepper, freshly ground if possible
cayenne pepper
- In a small bowl, combine the melted butter, lemon juice, garlic, mustard, paprika, and a pinch of cayenne pepper. Whisk the sauce to combine everything.
- Stir in the parsley, chives, crushed red pepper flakes, lemon zest, and thyme, and season everything with salt and pepper. For a thicker butter sauce, add more mustard.
This recipe can also be made into a solid piece of cowboy butter by using a stick of softened butter instead of melting it:
- Place the softened butter in the bowl of a mixer fitted with a paddle attachment. Whip the butter until it's fluffy. Add the remaining ingredients and mix everything until it's completely combined, scraping the sides as needed.
- Lay out a long piece of plastic wrap and scoop the butter mixture in a long strip down the middle of it. Carefully pull one side of the plastic wrap over the butter, squeezing it gently to form it into a log. Continue to roll the log of butter into a roll. When it's all rolled up, twist the ends (like a piece of candy) until they become very taut (this means the butter is pressing together inside the plastic to form a cohesive roll).
- Place the roll of butter into either the fridge or the freezer so it will harden.
Friday, October 8, 2021
Everyday Cranberry Sauce
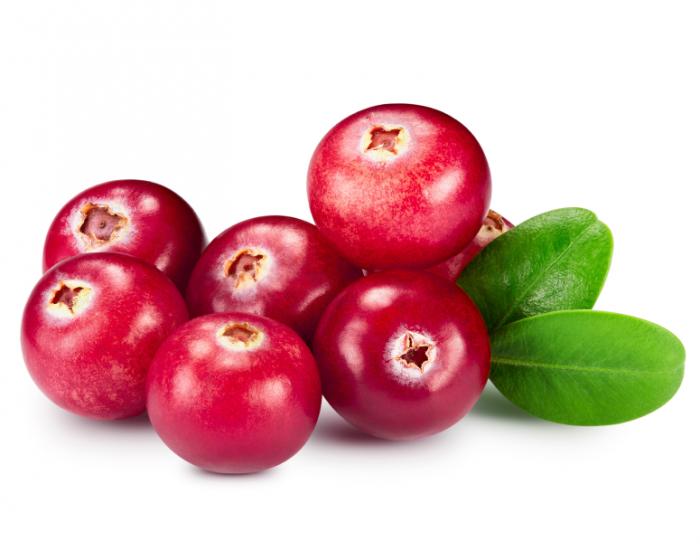
Ingredients
475 mL reduced-sodium chicken broth
100 g cranberries
115 g onion, finely chopped
60 g sugar
15 g butter
5.5 g cornstarch mixed with 15 mL water
2.5 g dried sage
2.5 g dried thyme
- In a large saucepan melt the butter over medium heat. Add the onions, and let them cook for about 8 minutes, until they turn golden, stirring occasionally.
- Add the dried sage and thyme and cook for a minute. Pour in the chicken broth and let it simmer for about 10 to 15 minutes until it has reduced to about 355 mL. Strain the mixture then pour the liquid back into the saucepan.
- Put the cranberries and the sugar in the liquid, and boil for about 5 to 8 minutes until the berries burst. Whisk in the cornstarch mixture then let it come to a boil again. Cook until the sauce begins to thicken, about 1 to 2 minutes. Remove the saucepan from the heat and let the sauce thicken as it stands. Season with salt and pepper and serve on the meat of your choice.
Saturday, August 8, 2020
The Need To Know Classic That Is: Coq au Vin

Ingredients
1.8 kg chicken, cut into eight pieces, or eight chicken parts
710 mL red wine (use Burgundy if you're a traditionalist)
450 g pearl onions, peeled
330 g mushrooms (button mushrooms are normally used)
225 g lardons
30 g butter
- a lardon is a small strip or cube of fatty bacon, or pork fat. Pancetta can be used as a substitute; I used whatever bacon I had in the fridge
30 mL olive oil
at least 2 garlic cloves, peeled and crushed
1 bouquet garni
flour
- a bouquet garni is a bunch of herbs tied up in cheesecloth used to season your food. Traditionally bay leaves, parsley, and thyme is used; I used what was in the "Mixed Herbs" packet I had in the cupboard
salt and pepper
- Preheat the oven to 180°C. Season the chicken pieces with salt and pepper. Put some flour in a large plastic zip-top bag, add the chicken, seal, and shake to cover the meat evenly. Heat the olive oil and the butter in a Dutch oven or casserole dish, and cook the chicken over high heat for five to six minutes until browned - depending on the size of your pan, this may require doing so in batches.
- Remove the chicken when it has finished cooking and set the meat aside somewhere to keep warm. Cook the bacon in the same pan until it is crisp. Remove the bacon from the pan, add the onions and cook them for four to five minutes until they begin to brown. Pour in the wine and stir the contents to remove anything sticking to the sides and bottom of the cooking dish.
- Place the chicken and the bacon back in the pot and add the garlic and the bouquet garni. Bring everything to a boil, cover, then place the dish in the centre of the oven for 75 minutes.
- Add the mushrooms and let everything cook for another 15 minutes. Remove the dish from the oven, take out the chicken, bacon, mushrooms, and onions, and place them in a serving dish. The bouquet garni can be thrown out.
- Return the cooking dish and its juices to low heat on the stove, and check to see if more salt and/or pepper is required, then bring to a rapid boil until the sauce is thick and glossy. Pour the sauce over the food and serve immediately on its own, or with crusty French bread, mashed or roasted potatoes or anything starchy to soak up the sauce.
Sunday, June 17, 2018
Father's Day Spice Rub
 |
| Kid Franklin's Special BBQ rub |
Ingredients:
45 g sugar
30 g brown sugar
30 g smoky paprika
30 g Kosher salt
15 g cumin
15 g chili powder
15 g black pepper
15 g onion powder
15 g garlic powder
15 g celery salt
5 g oregano
- Mix all the ingredients well. Rub on all sides of any meat you want to eat before cooking.
Saturday, July 15, 2017
Satisfy Your Jerk Chicken Fix
Ingredients:
20 whole allspice berries
10 sprigs thyme
5 whole cloves
3 star anise pods
2 habaneros, seeds and ribs removed, roughly chopped
2 garlic cloves, peeled, roughly chopped
1 bottle cola
juice of 1 lemon and 1 lime
1 whole nutmeg
1 cinnamon stick
1 5 cm piece ginger
1.4 kg chicken thighs, bone in, skin on
170 g packed brown sugar
15 g kosher salt
15 g browning seasoning, optional (look for it in the "international" section of your supermarket)
canola oil
- Place the chicken thighs in a bowl and cover them with kosher salt. Pour cola in the bowl until the chicken is covered, stirring to dissolve the salt. Place the entire bowl into the refrigerator, covering it with plastic wrap for 12-24 hours.
- Combine and grind until fine the nutmeg, allspice, star anise, cinnamon stick, and cloves using a blender (a spice grinder or mortar and pestle can also be used). Place the ground-up spices in a small pan over low heat to toast, moving them constantly for about 2 minutes. When the spices are nice and fragrant, pour them into a blender.
- Cut the ginger root in half lengthwise, with the skin still on. Char the root until the skin is blackened (on the grill, under the broiler, in the toaster oven - you figure it out), then roughly chop it, and add it to the spices in the blender, along with the brown sugar, the citrus juices, the peppers, the garlic, the browning seasoning (if using), the thyme, and the salt, and blend on high until everything is smooth.
- Take the chicken from the fridge, and place the chicken in a large resealable bag. Add the marinade, seal the bag, and allow the meat to get covered. Put the bag in the fridge and allow the thighs to marinate for at least 8 hours or up to two days.
- Get your grill ready for medium-high heat. Grease the grates or your grill pan with the canola oil, and place the thighs, skin down onto the grill over direct heat or in the pan. Cook for about ten minutes, or until the skin releases itself from the cooking surface. Flip the thighs over, and cook for another ten minutes, or until the juices run clear, or you get a reading of 74°C from a meat thermometer.
Friday, July 8, 2016
Your New Favourite Way To Cook Chicken
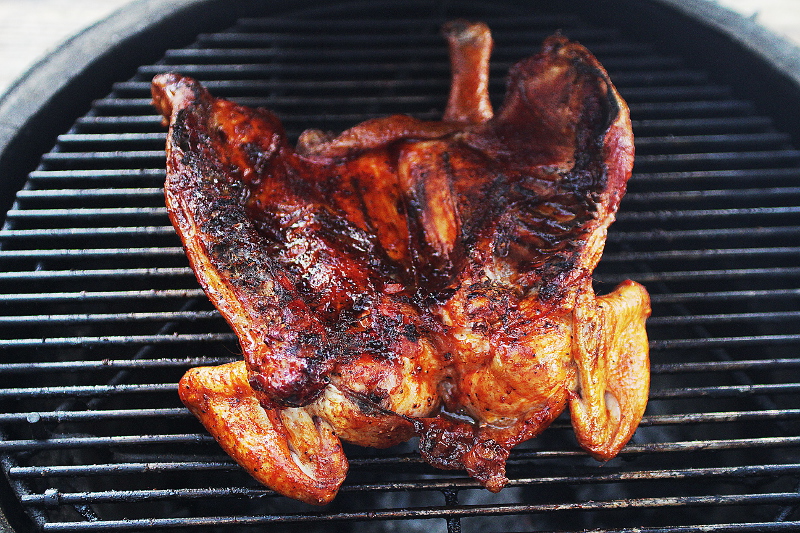
Ingredients
1 1.5 to 1.75 kg. chicken
30 mL olive oil
10 g ground cumin
10 g ground ginger
10 g paprika
5 g cinnamon (I used five-spice powder)
2 g crushed red pepper flakes (I used Chipotle)
2 g crushed saffron (optional)
salt and pepper to taste
- Once the bird is out of its wrappings and the innards have been removed, pat it dry with some paper towels
- Turn the carcass so that the neck flap is facing you, and cut down the right side of the spine with a pair of kitchen shears. Try not to cut into the spine itself, just to the side of it. Once the first cut is done, flip the bird around again and cut it down the other side. The spine can now be thrown out or saved to make stock.
NOTE: This can be done by a butcher if you ask them. - Flip the chicken over skin side up, and using both hands, press down on each breast to break the sternum so that the chicken lies flat. You can remove the keel bone that connects the two halves of the chicken together, but it's not required.
- Brush the olive oil on the chicken, and then season it with the spices, and the salt and pepper.
- If you're doing your cooking in the oven, place the chicken skin side up on a wire roasting tray in a roasting pan, and broil at medium heat for about 10 minutes. Once the skin has browned, turn the meat over, and switch your oven to the bake setting, at 350°F (177°C). Cook until either the juices run clear when you poke it with a fork, or when a thermometer reads 165°F (71°C).
If you're cooking on the BBQ, you'll be using indirect heat. Preheat your grill at its high setting, and turn off either the middle or the side burner(s) to provide the indirect heat. Get your heat to about 425°F (220°C). Place the chicken skin side up on the turned off burner(s). Cook with the lid closed for 35-45 minutes, or until either the juices run clear when you poke it, or when a thermometer reads 165°F (71°C).
Monday, June 6, 2016
Common Sense BBQ Tips

- Make sure you have extra charcoal or propane. Seems obvious, until you can't get your fire started, or when your fire goes out.
- Take your meat or fish out of the fridge at least two to three hours before putting it on the grill if you don't want to deal with your food being cold on the inside.
- Mise en place isn't just for indoor cooking. Have your BBQ tools - tongs, spatulas, a sharp knife, basting brushes, fire extinguisher - cleaned and nearby before you head outside.
- Using a gas grill? Let it heat up for at least 10 minutes. Got yourself a charcoal grill? Let it heat up for at least 20 minutes.
- If you’re using a charcoal grill, empty the ashes from your last grilling session. Check the grease tray as well for gas grills.
- Use only one cut of meat or fish. It's hard enough to get the right cooking temperature for one cut of meat, let only several.
- Go with lump charcoal if you want the best smoky flavour. Don't fret if you have a gas grill as you can still get some of the smoky flavour from the fat of the meat cooking at high heat if you don't have a smoker box.
- Don’t light your charcoal with lighter fluid. It's a fast way to start the fire, but it can make your food taste funny.
- Create gradations of heat on your barbeque by stacking your coals asymmetrically once they are hot. By doing this, you can move things that are charring on the outside across to the cooler part of the grill. Always keep an area of the grill with no coals under it at all – a place to rest food that is cooked and to move things to if you have a flare-up.
- Avoid squirting water on the flames when things flare up, as this will send ash flying over your food. Try moving the food over the part of the grill with no coals underneath it instead.
- If you are nervous about getting it right, use a meat thermometer to check it your meat is done. To make sure your meat is cooked to the right temperature, this is a link to a temperature cheat sheet.
- If you have any leftover marinade, cook it up on the grill in a metal bowl to kill off any bugs. or pour it over the cooked meat as a sauce.
- Consider rubbing in a separate marinade after you have cooked it. Barbecued fish is delicious if rubbed with very finely chopped parsley and garlic in olive oil. When cooking meat, smear some butter blitzed with herbs, salt, pepper and garlic on top of a chopping board. Place the cooked meat on the butter so it can melt and soak into the meat as you carve it.
- Be lazy and don't clean your barbecue after use. If you leave the fat on the grill, it will prevent rust from forming. To clean it, get your grill nice and hot and then rub the charred debris off with a coarse wire brush.
Friday, May 15, 2015
The Truth About Beer Can Chicken
.jpg/240px-Robb's_beer_can_chicken%2C_Chicago_(cropped).jpg)
To be fair, there is a reason people love the taste of beer can chicken, it does a lot of things right. The chicken is exposed to convection heat so it can crisp the skin on all sides, and because the legs aren't tied together, the dark meat can be exposed to more heat and finish a bit hotter than the thicker breasts. But the cooking method used leaves a lot to be desired. The can prevents the chicken from cooking on the inside. With a metal can shoved up its butt, warm air cannot enter the cavity of the chicken from below, and only a small amount can enter from above through the neck cavity. All the heat must enter the meat from the outside. Because meat doesn't heat evenly, it progresses inward from the part in contact with air, making the outer parts warmer than the inner parts. By the time the meat nearest the cavity hits 74°C, the outer layers are in the 82 to 88°C range. That may darken and crisp the skin a bit more, but it makes the outer layers drier.
And contrary to what the recipe being used says, the beer doesn't add moisture or flavour to the chicken. Because beer is about 90% flavorless water, and 5% flavorless alcohol, all the flavour compounds are at most 3.5% of the weight. In a 355 mL can of beer, that's about 1 teaspoon of stuff with flavour; even if you add herbs and spices to the beer, their flavour compounds don't dissolve in water. Finally, there are the safety factors. If you forget to open the can, it can explode; hot fat from the drip pan may burn you; the drip pan might catch on fire, burning the bird; removing the bird from the can is a pain, because the can usually sticks to the chicken during cooking; the ink on the outside of the beer can (and the widget in that can of Guinness) probably isn't food grade and may seep into your food. There's enough here to make you reconsider even lighting your grill, but if you're like me, you're still going to make and eat beer can chicken. Because you like cooking it this way, and you like how it tastes when you do so. Sometime in the future, I'll try grilling a butterflied chicken (removing the backbone, flattening it, cooking it skin up on the indirect side, and then flipping it skin down on the direct side for a few minutes), or adding a rotisserie attachment to my BBQ. Until then, here's the recipe I use for beer can chicken:
Ingredients
1 1.81 kg. whole fryer
1 355 mL can of beer
240 g butter
30 g. garlic salt
30 g. paprika
salt and pepper
- Preheat your BBQ for low heat.
- In a small pot on the stove, melt the butter. Add the garlic salt, the paprika, and salt and pepper, to taste. Mix together, and let simmer at low heat.
- Open the beer and drink half of it. Check to see if the neck and giblets have been removed from the cavity of the chicken, remove them if you find them. Baste the chicken with the melted seasoned butter. Either pour the remaining butter in the beer can or save it for further basting as it cooks; the choice is yours.
- Position the chicken in the way your beer can apparatus recommends you to; if push comes to shove, lower the chicken on to the open can, so that the chicken is sitting upright, with the can in its cavity, and place the chicken on the grill, using the legs and beer can as a tripod to support the chicken on the grill and keep it stable. Cover the grill and let the meat cook for about 45 minutes.
- Check the chicken every 15 minutes or so, until a meat thermometer inserted into the thickest part of the thigh reads 74° C.
- Let the chicken rest for 10 minutes. Carefully lift the chicken off of the can. If it gets stuck, lay the chicken on its side, and pull out the can with tongs.
Tuesday, March 18, 2014
Soup of the Day

Last Wednesday Ottawa was hit with another blast of snow and ice after a winter full of them. Hopefully, that was the last of the polar vortex, but just in case, I've decided to stock up and make some hearty soups for any remaining chilly nights. I've decided some on white bean and garlic soup and a basic chicken stock so I can make a quick chicken soup in the future, and some creamy goodness in the near future. So Old Man Winter, do your worse- but spring can hurry up and make an appearance anytime now.
Ingredients: White Bean and Garlic soup
2 cups dry white beans
2 cups chicken or vegetable stock
1 medium yellow onion, diced and sautéed
3 slices French bread, coated in olive oil and toasted on both sides
1/2 head garlic
salt, pepper
- Soak the beans in water overnight. After soaking, drain the beans, put them in a pot, fill it with water, bring it to a boil, and let everything simmer for at least 15 minutes.
- If you want your beans to be a less musical fruit, be sure to soak and boil your beans. A protein called phytohaemagglutinin causes all that farting and boiling the beans denatured this protein to produce a more silent meal.
- Remove the beans from the water and put them in a food processor. Add whatever stock you're using, the onion, the French bread, the garlic, and the salt and pepper, then purée until everything is blended.
Ingredients: Chicken stock
1.8 to 2.3 kg. poultry parts (ie. chicken back, neck, and wing bones), or a 1.8 to 2.3 kg. whole bird
cold water
1 unpeeled onion, coarsely chopped
1 celery rib, coarsely chopped
1 carrot, coarsely chopped
8 black or white peppercorns
1 bouquet garni
- Place the poultry parts in a stockpot, and cover them with cold water. Slowly bring everything to a boil.
- Once at a boil, reduce the heat, simmer for about 30 minutes uncovered, skimming often. Add the vegetables and the spices. Continue simmering and skimming for about 3 to 4 hours. Add water to cover everything only if necessary.
- To cool, place the stockpot uncovered in the sink, partially immersed in ice water. Refrigerate covered. The fat that rises is a protective coating, so don't remove it until just before you reheat the stock for serving or use.
Makes about 10 cups, and keeps for about 3-4 days refrigerated, and up to 6 months if frozen.
The recipes featured in this blog came from:
Friday, October 11, 2013
Quick and Dirty Chicken Marinade
Has this ever happened to you - you see a recipe in your favorite cookbook that you want to make, you go to your pantry, and you discover that don't have some of the necessary ingredients? When this happens, you can do one of two things - head to the grocery store, or improvise with what you got. I chose the latter when I made a chicken marinade from a recipe in The "Joy of Cooking ", and all things considered, I think it turned out fine.
Mix in a bowl until well blended the following:
Mix in a bowl until well blended the following:
1/4 cup beer
1/4 cup vinegar
1/4 cup olive oil
2 tablespoons balsamic vinegar2 tablespoons oregano
2 tablespoon lemon juice or Italian salad dressing
1 tablespoon Old Bay seasoning
2 teaspoons salt
2 teaspoons black pepper
2 teaspoons soy sauce
4 to 6 garlic cloves, minced
3 dashes hot sauce
Subscribe to:
Posts (Atom)
Festive Holiday Baking
Are you a hybrid worker being forced to attend an office potluck? Do you need a dessert for your child's Christmas bake sale? Feel l...
-
 With rib festivals happening numerous times throughout the year over the city, Ottawa's love for grilled meat has been well establishe...
 -
 If you lived in Ottawa at any point in the 80s, you saw one of these cartoons on CJOH at noon - the underrated " Rocket Robin Hood ...
 -
 The WORKS Glebe (580 Bank St.) The B.A.B Burger ($15.96) The B.A.B. A common gimmick for food blogs is to eat and review every popula...