Showing posts with label grill. Show all posts

Saturday, October 31, 2020

Better Bacon

We all know that the love people have for bacon borders on obsession. But what is the best way to prepare the salt-cured pork belly everyone craves? Inspired by a feature on Cooking for Engineers, I tested several different cooking methods and compared the results. As it was on sale at the time, I used Schneiders Classic Cut brand bacon for the tests. Each piece of bacon was rated out of five, with five being excellent, and a score of one being inedible. Assisting me with the tasting part of the experiment were the other bacon eaters in the house, my wife Dawn Xanklin, and our son, a fourth-grade bacon connoisseur.

Baked on Aluminum Foil
I placed enough aluminium foil to line a baking sheet, then I put the bacon on top, and baked it at 205°C until it was done to my liking, flipping the bacon occasionally.


Cooking Time: 17 minutes + 17 minutes for oven to reach temperature = 34 minutes
Scores: Franklin on Food: 5 DXanklin: 4 Kid Franklin: 5

Cast Iron Skillet
For this I placed the bacon in a cold cast iron skillet and cooked it at medium heat, flipping the bacon occasionally until it looked good enough to eat.


Cooking Time: 11 minutes
Scores: Franklin on Food: 4 DXanklin: 4 Kid Franklin: 4

Grilled
I put the three strips on some aluminium foil and placed it over two burners on a BBQ at high setting.


Cooking Time: 17 minutes
Scores: Franklin on Food: 4 DXanklin: 5 Kid Franklin: 5

Instant Pot
The bacon was made to fit in a single layer in the Instant Pot cooking chamber. Then I hit the Saute button and cooked everything for three minutes intervals, flipping the bacon before hitting the button again.


Cooking Time: 9 minutes
Scores: Franklin on Food: 3.5 DXanklin: 4 Kid Franklin: 5

Microwave
I took three slices of bacon and placed them on three paper towels on a dinner plate, which I then I put into my microwave oven.


Cooking Time: 3 minutes on high, then cooked 30 seconds until it was done to my liking = 4.5 minutes
Scores: Franklin on Food: 3 DXanklin: 3 Kid Franklin: 5

Water in Skillet
After arranging the bacon in a cold metal frying pan, I added just enough water to cover everything. I then cooked it over high heat until the water boiled, lowered the heat to medium until the water evaporated, and then continued cooking the bacon over medium-low heat until it was ready.

Scores: Franklin on Food: 5 DXanklin: 5 Kid Franklin: 5
Cooking Time: 14 minutes

Notes and Observations:
The overall favourite was the one I was the most skeptical about, the water in the skillet method. It's the method the food scientists over at America's Test Kitchen recommend, as they theorize that the water keeps the cooking temperature low and gentle, allowing the bacon to retain its moisture and stay tender. This gave the bacon a nice ratio of crispiness and chewiness. While it does let the bacon cook in its own fat, the oven is not the most efficient way to cook a small amount of bacon, and it takes the longest of the methods tried. It's much better for larger amounts. Instant Pot bacon isn't an option if you don't have the all-in-one wonder device and barbeque grilled bacon may not be an option if you don't have the equipment or the desire to cook outside. It doesn't get more old school than cooking bacon in a cast oven pan, and while you can't beat the speed of a microwave, it did produce the least liked bacon of the tests. To see which way works best for your bacon needs, you will have to try each method on your own. If you do decide to try this experiment, please note that cooking this much bacon at one time will make the area around your kitchen smell amazing.

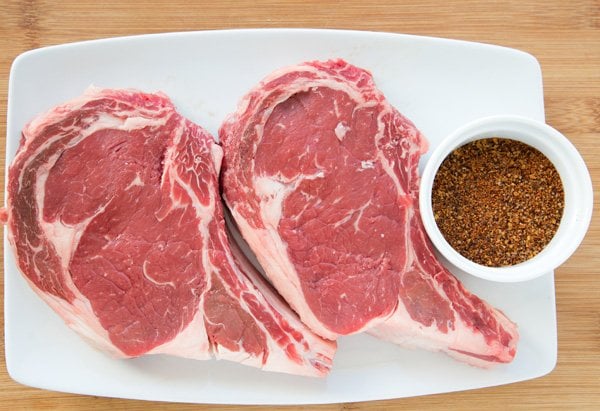
Friday, April 5, 2019

Better Steaks With Meaty Food Hacks

After a winter that refuses to let go of its grip on the city, grillmasters are chomping at the bit to fire up their barbeques. With the chance of snow or rain constantly looming in the forecast, you may want to treat yourself to a dry-aged steak when you finally do get to cook outside.  Dry-aging removes moisture from a piece of meat and causes a breakdown of the muscle tissue - basically, this process causes your steak to decompose. As disgusting as this process may sound, it also tenderizes the meat, and gives it an amazing flavour. Aged steaks can be bought, or be made at home, but while you're waiting for the snow to melt, or the backyard to dry out in order to get to your grill, you can experiment with these cheaper and faster food hacks.

Mushrooms

Chefs who don't have the time to wait 30+ days for that extra burst of umami suggest you season your steak with mushroom powder. Get some dried porcinis or shiitakes and grind them up using a food processor or blender, then season your steak with it, along with some salt and black pepper. Wrap everything in plastic wrap and let the steak sit in the refrigerator until you're ready to cook it.

Koji
Koji is a rice grain that has been introduced with a live culture and is used in the making soy sauce and miso paste. When koji is added, the live culture helps break down the carbohydrates, amino acids, simple sugars, and proteins.  If the live culture is used to break down beans, it stands to reason it can be used to break down the connective tissue in your steak. As with the dried mushrooms, you will need to turn the koji (check your favourite Asian supermarket or order some online) into a powder and rub it all over your steak. Once that's done, put the steak on a plate and place it in your refrigerator for three days. This will cause your meat to become fuzzy in appearance, and leave a pungent smell in your fridge so you may want to place your steak in the crisper if you don't want to deal with the smell, or in a separate refrigerator like your beer fridge (give the fridge good cleaning while you're at it). After three days, rinse all the koji from the meat, pat it dry, and then season it with salt and pepper as normal.

Fish Sauce
This hack takes longer than the others but is one used by Nathan Myhrvold of "Modernist Cuisine" fame, so you know it's legit.  Place your steak in a Ziploc bag, pour in about 15 mL of fish sauce per steak to coat the meat, then seal the bag as tightly as possible, getting out as much air as you can; if you have access to a vacuum sealer, now would be the time to use it. Put the meat in the refrigerator for three days. Take the steak out of the bag, wrap it tightly in cheesecloth, then put it back in the fridge for another three days. Season the meat all over with salt and pepper when it's time to cook.

Blue Cheese
As good as fish sauce is for replicating the rich funky flavour of an aged steak, blue cheese can also be used. Lay a sheet of plastic wrap on a baking sheet, then place an equal-sized piece of cheesecloth on top. Place your steak on the cheesecloth. Fold a thin layer of the cheesecloth over the steaks, then top with some crumbled blue cheese. Fold over the plastic wrap to secure the cheese on top, then refrigerate the wrapped steaks overnight. When it's time to cook,  unwrap the steaks, take off the blue cheese, and pat the steaks dry with paper towels before seasoning both sides of the steak with salt and pepper. You now have steak that is ready for cooking and some blue cheese to use in a sauce for them when it's time to eat.

Ingredients: Blue Cheese Sauce
180 mL heavy cream
35 mL Worcestershire sauce
140 g blue cheese
15 g unsalted butter
1 shallot, sliced
3 g kosher salt
3 g coarsely ground black pepper
  1. In a small saucepan over medium heat, melt the butter. Add the shallots and cook until golden brown, about 2 to 3 minutes.
  2. Stir in the cream and Worcestershire sauce and cook for another minute. Add the salt, pepper and blue cheese and stir well. Just as the cheese begins to melt, remove from the heat.

    To serve, spoon the sauce over the steaks or whatever else needs blue cheese added to it.

Friday, July 8, 2016

Your New Favourite Way To Cook Chicken

http://countrywoodsmoke.com/
Longtime readers of this blog know that while it gets the job done, beer can chicken is a load of crap. If you're looking for a new way to cook your poultry, try butterflying the bird first. By removing the bird's spine, or spatchcocking it, you flatten it out, allowing the heat from the grill to come from a single direction, making it easier to cook, and for it to get a nice, crispy brown skin. Great for either the BBQ or the oven, I recently tried a version of the recipe below as part of my vacation cooking responsibilities.


Ingredients
1 1.5 to 1.75 kg. chicken
30 mL olive oil
10 g ground cumin
10 g ground ginger
10 g paprika
5 g cinnamon (I used five-spice powder)
2 g crushed red pepper flakes (I used Chipotle)
2 g crushed saffron (optional)
salt and pepper to taste
  1. Once the bird is out of its wrappings and the innards have been removed, pat it dry with some paper towels
  2. Turn the carcass so that the neck flap is facing you, and cut down the right side of the spine with a pair of kitchen shears. Try not to cut into the spine itself, just to the side of it. Once the first cut is done, flip the bird around again and cut it down the other side. The spine can now be thrown out or saved to make stock.

    NOTE: This can be done by a butcher if you ask them.
  3. Flip the chicken over skin side up, and using both hands, press down on each breast to break the sternum so that the chicken lies flat. You can remove the keel bone that connects the two halves of the chicken together, but it's not required.
  4. Brush the olive oil on the chicken, and then season it with the spices, and the salt and pepper.
  5. If you're doing your cooking in the oven, place the chicken skin side up on a wire roasting tray in a roasting pan, and broil at medium heat for about 10 minutes. Once the skin has browned, turn the meat over, and switch your oven to the bake setting, at 350°F (177°C). Cook until either the juices run clear when you poke it with a fork, or when a thermometer reads 165°F (71°C).

    If you're cooking on the BBQ, you'll be using indirect heat. Preheat your grill at its high setting, and turn off either the middle or the side burner(s) to provide the indirect heat. Get your heat to about 425°F (220°C). Place the chicken skin side up on the turned off burner(s). Cook with the lid closed for 35-45 minutes, or until either the juices run clear when you poke it, or when a thermometer reads 165°F (71°C).

Friday, May 15, 2015

The Truth About Beer Can Chicken

The Victoria Day weekend is usually when the first big BBQ of the year happens. Along with hamburgers, hot dogs, planked salmon, and grilled vegetables, a popular food at these cookouts is beer can chicken. Perched on your favourite can of beer, and covered with an herb rub, the chicken is cooked on the grill, giving it a nice roast on the outside, with the inside bathed by the steam of the beer, keeping the meat moist. Or so we are told. Not only are there better ways to cook a chicken on the grill, the entire concept of beer can chicken is little more than a waste of beer. And nobody wants to do that on a long weekend.

To be fair, there is a reason people love the taste of beer can chicken, it does a lot of things right. The chicken is exposed to convection heat so it can crisp the skin on all sides, and because the legs aren't tied together, the dark meat can be exposed to more heat and finish a bit hotter than the thicker breasts. But the cooking method used leaves a lot to be desired. The can prevents the chicken from cooking on the inside. With a metal can shoved up its butt, warm air cannot enter the cavity of the chicken from below, and only a small amount can enter from above through the neck cavity. All the heat must enter the meat from the outside. Because meat doesn't heat evenly, it progresses inward from the part in contact with air, making the outer parts warmer than the inner parts. By the time the meat nearest the cavity hits 74°C, the outer layers are in the 82 to 88°C range. That may darken and crisp the skin a bit more, but it makes the outer layers drier.

And contrary to what the recipe being used says, the beer doesn't add moisture or flavour to the chicken. Because beer is about 90% flavorless water, and 5% flavorless alcohol, all the flavour compounds are at most 3.5% of the weight. In a 355 mL can of beer, that's about 1 teaspoon of stuff with flavour; even if you add herbs and spices to the beer, their flavour compounds don't dissolve in water. Finally, there are the safety factors. If you forget to open the can, it can explode; hot fat from the drip pan may burn you; the drip pan might catch on fire, burning the bird; removing the bird from the can is a pain, because the can usually sticks to the chicken during cooking; the ink on the outside of the beer can (and the widget in that can of Guinness) probably isn't food grade and may seep into your food. There's enough here to make you reconsider even lighting your grill, but if you're like me, you're still going to make and eat beer can chicken. Because you like cooking it this way, and you like how it tastes when you do so. Sometime in the future, I'll try grilling a butterflied chicken (removing the backbone, flattening it, cooking it skin up on the indirect side, and then flipping it skin down on the direct side for a few minutes), or adding a rotisserie attachment to my BBQ. Until then, here's the recipe I use for beer can chicken:
Ingredients
1 1.81 kg. whole fryer
1 355 mL can of beer
240 g butter
30 g. garlic salt
30 g. paprika
salt and pepper
  1. Preheat your BBQ for low heat.
  2. In a small pot on the stove, melt the butter. Add the garlic salt, the paprika, and salt and pepper, to taste. Mix together, and let simmer at low heat.
  3. Open the beer and drink half of it. Check to see if the neck and giblets have been removed from the cavity of the chicken, remove them if you find them. Baste the chicken with the melted seasoned butter. Either pour the remaining butter in the beer can or save it for further basting as it cooks; the choice is yours.
  4. Position the chicken in the way your beer can apparatus recommends you to; if push comes to shove, lower the chicken on to the open can, so that the chicken is sitting upright, with the can in its cavity, and place the chicken on the grill, using the legs and beer can as a tripod to support the chicken on the grill and keep it stable. Cover the grill and let the meat cook for about 45 minutes.
  5. Check the chicken every 15 minutes or so, until a meat thermometer inserted into the thickest part of the thigh reads 74° C.
  6. Let the chicken rest for 10 minutes. Carefully lift the chicken off of the can. If it gets stuck, lay the chicken on its side, and pull out the can with tongs.

Festive Holiday Baking

Are you a hybrid worker being forced to attend an office potluck?  Do you need a dessert for your child's Christmas bake sale?  Feel l...