Monday, September 12, 2016

Ramen - Japan's Greatest Invention

Now that everyone has gotten their books and gear for school, and adjusted to being on a schedule again, it's time to find ways to stretch that student budget. Many a starving student has turned to ramen, the Japanese instant version of Chinese style noodles. Debuting in 1958, they are made by making thin, quickly re-hydrated noodles, then steaming them, and frying them at 140℃, and air-drying them at 80℃. The traditional versions of these light yellow noodles are made from hard wheat flour, water, and alkaline salts and are somewhat stiff precooked. They are usually cooked in water with a pH of 5.5-6, often adjusted by adding something acidic. Once cooked, they are drained, washed, and cooled in running water. Ramen has come a long way from its humble beginnings, with regional ramen variations throughout Japan, as well as its own fan sites, museums, and video games. The recipe below may not be the real deal you would get at a restaurant, but I'm sure you can find other uses for the $15 you won't be spending.

Ingredients
2 packages of your favourite instant ramen noodles (Maruchan and Top Ramen are popular brands)
950 mL chicken stock
14 mL olive oil
5 mL red miso paste
240 g sweet corn
230 g fresh spinach, chopped
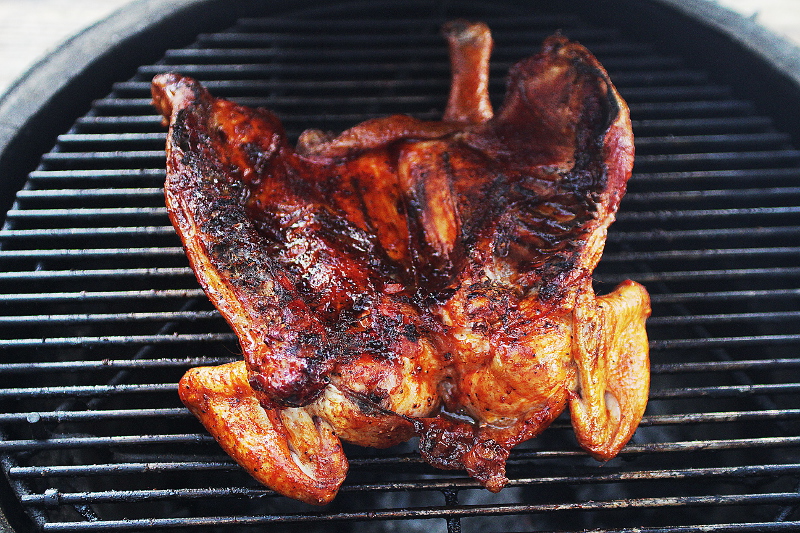
170 g cooked chicken (leftovers can be used)
14 g unsalted butter
4 large eggs
4 green onions, thinly sliced
toasted sesame oil (for drizzling)
nori (a paper-like, edible, toasted seaweed used in most kinds of sushi, found in Asian supermarkets; optional splurge)
  1. Bring some water to boil in a saucepan. Once boiling, reduce the heat until the water is just simmering, and gently add the eggs and cook them for 6 minutes. Remove the eggs with a slotted spoon and place in an ice bath. Let them cool completely before peeling them.
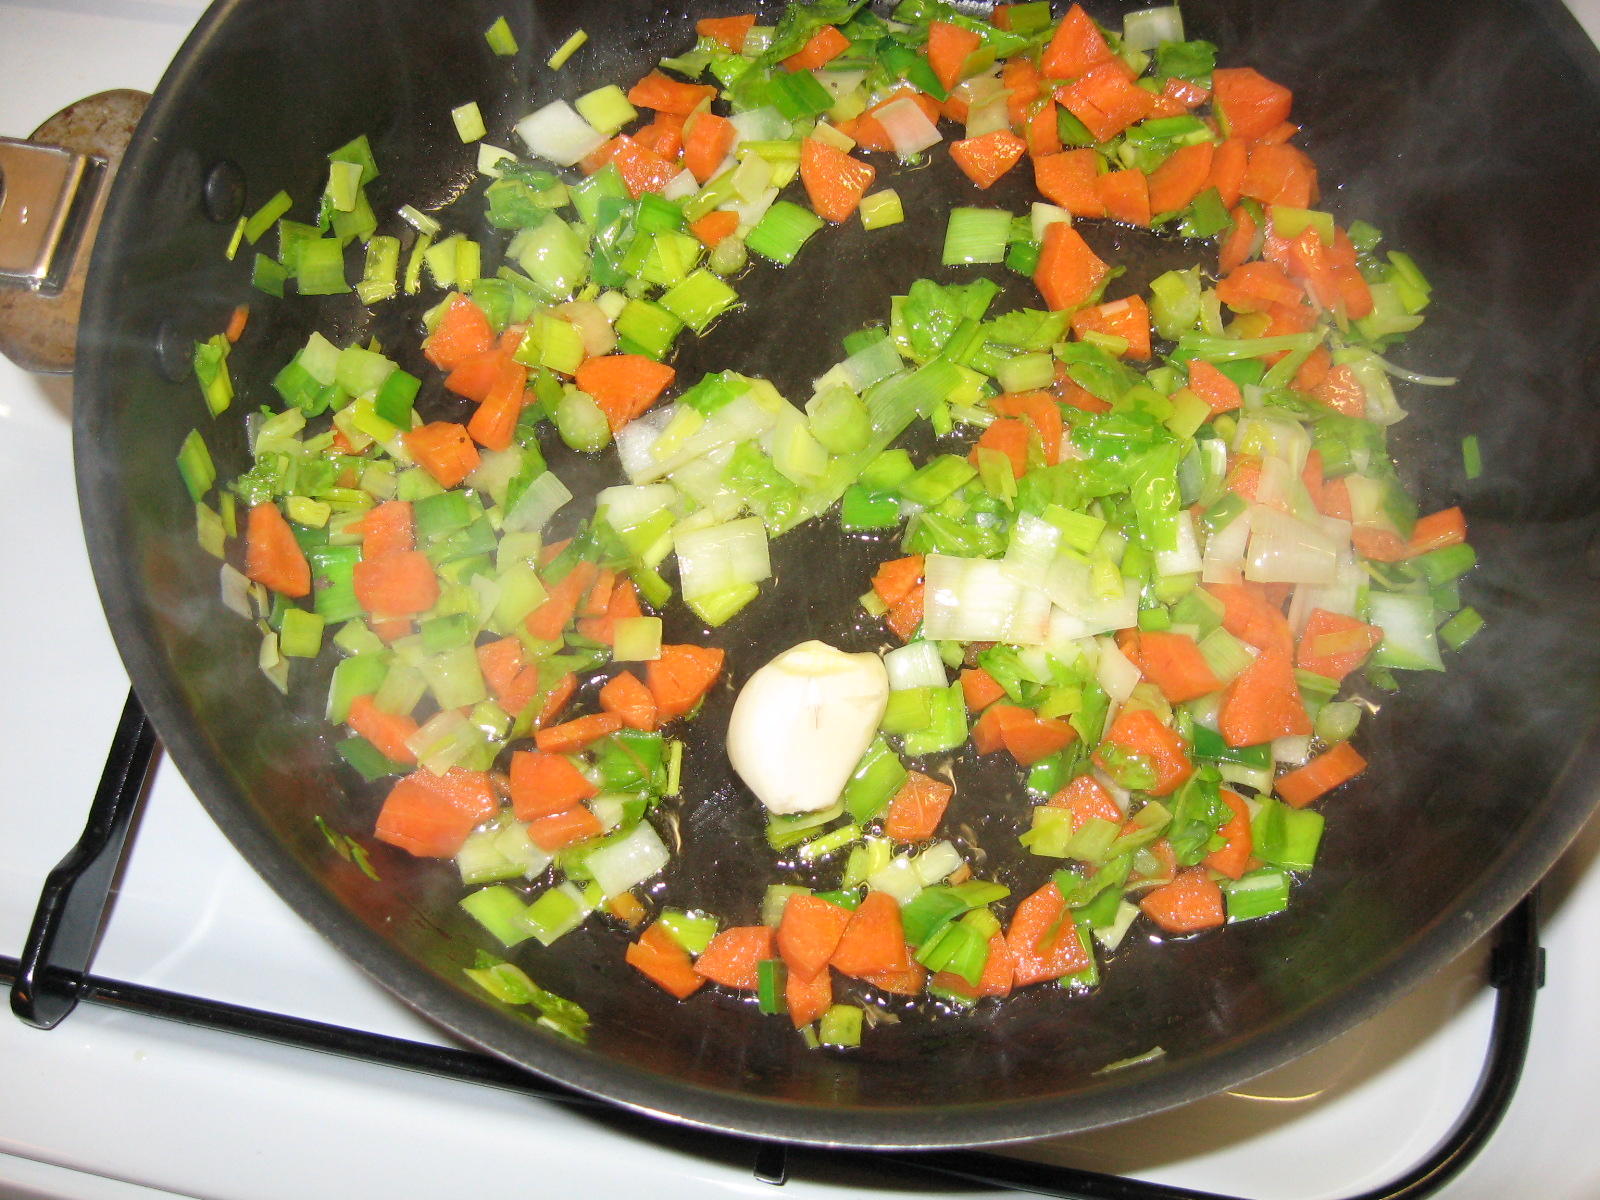
  2. In another saucepan, melt the butter and add the corn kernels, stirring to coat them, and season them with salt and pepper. Place the corn in a bowl. Add the olive oil to the pan and cook the spinach until it just begins to wilt.
  3. Heat the chicken stock in a suitably sized pan just until it's boiling, then whisk in the miso paste. Add the ramen noodles and cook according to the directions on the package, but use only one seasoning packet. As soon as they are finished, serve them in bowls, by adding the noodles, corn, spinach and chicken, then ladling some of the broth over top. Finish the bowls with the sliced green onions, the soft boiled eggs cut in half,  and a drizzle of sesame oil. Serve with the nori on the side of the bowl.

Saturday, September 3, 2016

Celebrate Bacon with the Bacon Ice Cream Sundae

As it is International Bacon Day today, and with Baconpolooza happening next weekend, I thought this would be a good time post this dessert recipe I received in the gift bag I got when I volunteered at Baconpolooza's inaugural event last year.

Ingredients 

500 g sugar
185 mL water
60 mL heavy cream
30 mL butter
2 strips bacon
your favourite ice cream
Caramel Sauce
  1. Mix 250 g of sugar and 125 mL of water in a saucepan. Heat on medium-high until mixture starts to turn colour.
  2. When the mixture turns golden, add the butter and cream.
  3. Remove from heat. Use a wooden spoon to stir until smooth.
  4. Pour into a heatproof container, and let cool.
Bacon Brittle
  1. Mix the remaining sugar and water in a saucepan. Heat on medium-high until mixture starts to turn colour, about five minutes.
  2. When the mixture turns amber, remove from heat and pour out on a non-stick baking sheet.
  3. Chop the bacon into 1/4" pieces, place in a frying pan, and cook until bacon is crispy.
  4. Drain the bacon fat, then sprinkle the bacon bits onto the cooked sugar.
  5. When completely cool and hard, break into pieces.
  Bacon Ice Cream Sundae Assembly
  1. To serve, scoop some ice cream into balls and roll in the bacon brittle to coat completely.
  2. Place in individual serving bowls. Top with the caramel sauce.

    Note: Adding whipped cream and a cherry on top is optional but recommended.

Wednesday, August 31, 2016

My Favourite Cookbooks


The local literary world is buzzing about "Ottawa Cooks", a cookbook featuring recipes from some of the city's best chefs. While I usually rely on the Internet when it comes to finding recipes, there's something about cookbooks that still appeals to me. Here are some of my favourites:


Cooking for Geeks
My love for this cookbook can be found throughout this blog, and for good reason, as it reads less like a cookbook and more like an interesting textbook. It's the perfect book for people who consider the kitchen their personal laboratory and should be required reading for anyone teaching an elementary or high school Home Ec class.
  
DC Super Heroes Super Healthy Cookbook
This is the first cookbook I've ever followed a recipe from. Given how popular superheroes are these days (in spite of things like "Batman vs. Superman", ironically enough), it's a bit surprising it is still out of print. 
The 4-Hour Chef
For people who want to do things better, and do it in as short a time possible, look no further than this book, not surprisingly from the author of "The 4-Hour Workweek". 
The Joy of Cooking
You could get by with just this cookbook for the rest of your life and be happy with your results. A must-have for a cook of any skill level, whether you're a millennial, a baby boomer, or anyone in between.
The Laws of Cooking
A protege of the mad scientist of the cooking world Alton Brown, Justin Warner breaks down cooking into combinations based on familiar foods (ie. bitter+fat+sweet=the Law of Coffer, Cream, and Sugar), that teach why certain flavors work better than others, with recipes that force you out of your cooking comfort zone whether you like to or not.

Thursday, July 28, 2016

Summertime Quick Pickling

As we sweat through the dog days of summer, it's easy to forget that the cold bite of winter will soon be upon us. While it's not possible to bottle up the warmth of the season, it is possible to capture the taste of summer by pickling some of your vegetables. It's not as hard or time consuming as you would think, it's a great way to savour the bounty from local farmer's markets, and it adds a little something to a meal no matter what season.


Ingredients / Equipment

vegetables (cucumber; baby carrots, cauliflower, green beans, okra, onions, radishes, zucchini)
equal parts water and vinegar (enough to cover the vegetables, ratio can be adjusted according to tastes)
30 g granulated sugar
30 g kosher salt
15 g brown mustard seeds
5 g whole black peppercorns
1 bay leaf
enough canning jars for your vegetables
  1. Pack your vegetable of choice tightly in a glass jar, leaving about 1 cm of room at the top. Place each vegetable in its own jar as vegetables pickle differently and at different rates.

    Note: Crunchy vegetables, like carrots, should be boiled a little before pickling; delicate vegetables such as cucumber and zucchini, don’t need to be cooked ahead of time.
  2. Toast the mustard seeds and peppercorns in a saucepan over medium heat for about two minutes, or until fragrant . Add the remaining ingredients and stir until the sugar and salt have dissolved, and bring the mixture to a boil.
  3. Pour the brine into the jar immediately, covering the vegetables completely. Allow about an hour for the mixture to cool to room temperature, then tightly seal the jar. Shake it or rotate it to evenly distribute the brine and spices, then store in the refrigerator for at least 24 hours and preferably a week before using. Your vegetables should last for about a month.

Friday, July 8, 2016

Your New Favourite Way To Cook Chicken

http://countrywoodsmoke.com/
Longtime readers of this blog know that while it gets the job done, beer can chicken is a load of crap. If you're looking for a new way to cook your poultry, try butterflying the bird first. By removing the bird's spine, or spatchcocking it, you flatten it out, allowing the heat from the grill to come from a single direction, making it easier to cook, and for it to get a nice, crispy brown skin. Great for either the BBQ or the oven, I recently tried a version of the recipe below as part of my vacation cooking responsibilities.


Ingredients
1 1.5 to 1.75 kg. chicken
30 mL olive oil
10 g ground cumin
10 g ground ginger
10 g paprika
5 g cinnamon (I used five-spice powder)
2 g crushed red pepper flakes (I used Chipotle)
2 g crushed saffron (optional)
salt and pepper to taste
  1. Once the bird is out of its wrappings and the innards have been removed, pat it dry with some paper towels
  2. Turn the carcass so that the neck flap is facing you, and cut down the right side of the spine with a pair of kitchen shears. Try not to cut into the spine itself, just to the side of it. Once the first cut is done, flip the bird around again and cut it down the other side. The spine can now be thrown out or saved to make stock.

    NOTE: This can be done by a butcher if you ask them.
  3. Flip the chicken over skin side up, and using both hands, press down on each breast to break the sternum so that the chicken lies flat. You can remove the keel bone that connects the two halves of the chicken together, but it's not required.
  4. Brush the olive oil on the chicken, and then season it with the spices, and the salt and pepper.
  5. If you're doing your cooking in the oven, place the chicken skin side up on a wire roasting tray in a roasting pan, and broil at medium heat for about 10 minutes. Once the skin has browned, turn the meat over, and switch your oven to the bake setting, at 350°F (177°C). Cook until either the juices run clear when you poke it with a fork, or when a thermometer reads 165°F (71°C).

    If you're cooking on the BBQ, you'll be using indirect heat. Preheat your grill at its high setting, and turn off either the middle or the side burner(s) to provide the indirect heat. Get your heat to about 425°F (220°C). Place the chicken skin side up on the turned off burner(s). Cook with the lid closed for 35-45 minutes, or until either the juices run clear when you poke it, or when a thermometer reads 165°F (71°C).

Wednesday, June 15, 2016

The Secret of Soffritto

Carrots, celery, and onions by themselves may not look like meal starters, but together, they become an amazing combination that brings flavour to a variety of meals. This magic ingredient is called soffritto, an Italian term for onions, celery, and carrots, diced small and cooked in a bit of butter or oil until they are soft and golden. When combined, the caramelization of the vegetables brings out the sweetness of the carrot, the umami of onion, and the freshness of the celery, and is used as a flavor base for many sauces, soups, and stews. It can also be added to scrambled eggs, leftover meats or fish; mixed into jarred pasta sauces; or tossed in with vegetable sautés. With a recipe this versatile, your mealtime will never be the same again.

Ingredients
Butter or olive oil
Carrots
Celery (even the limp stuff will do)
Onions
  1. Roughly dice the vegetables into equal amounts (when in doubt, go with more onions than more of the others).
  2. Heat some of either the butter or olive oil in a pan at medium heat. Toss in the onions, and cook them until they’re translucent. Add in the carrots and celery, lower the heat, and cook, stirring occasionally, until all of the vegetables are soft and limp, and start to turn golden. Depending on how brown you want it, this can take anywhere from 30 minutes to an hour.
  3. Store the soffritto in oil for up to three days in your fridge, or freeze it by spooning it onto either sheet of parchment paper or plastic wrap, and then rolling everything up into a log and then freezing it in a resealable freezer bag. This way, you can cut slices off as needed in the future.
NOTE: Storing soffritto carries a small risk of botulism, as low-acid vegetables, like onions can provide a home for botulism-causing spores. For more information about botulism, please contact this Health Canada webpage.

Monday, June 6, 2016

Common Sense BBQ Tips

It's that time of year when people leave the confines of the kitchen and go do some cooking outdoors. If you are about to fire up the barbeque for the first time or plan to make the most of your grill, here are some grilling tips to help make things go more smoothly this BBQ season:
  • Make sure you have extra charcoal or propane. Seems obvious, until you can't get your fire started, or when your fire goes out.
  • Take your meat or fish out of the fridge at least two to three hours before putting it on the grill if you don't want to deal with your food being cold on the inside.
  • Mise en place isn't just for indoor cooking. Have your BBQ tools - tongs, spatulas, a sharp knife, basting brushes, fire extinguisher - cleaned and nearby before you head outside.
  • Using a gas grill? Let it heat up for at least 10 minutes. Got yourself a charcoal grill?  Let it heat up for at least 20 minutes.
  • If you’re using a charcoal grill, empty the ashes from your last grilling session. Check the grease tray as well for gas grills.
  • Use only one cut of meat or fish. It's hard enough to get the right cooking temperature for one cut of meat, let only several.
  • Go with lump charcoal if you want the best smoky flavour. Don't fret if you have a gas grill as you can still get some of the smoky flavour from the fat of the meat cooking at high heat if you don't have a smoker box.
  • Don’t light your charcoal with lighter fluid. It's a fast way to start the fire, but it can make your food taste funny.
  • Create gradations of heat on your barbeque by stacking your coals asymmetrically once they are hot. By doing this, you can move things that are charring on the outside across to the cooler part of the grill. Always keep an area of the grill with no coals under it at all – a place to rest food that is cooked and to move things to if you have a flare-up.
  • Avoid squirting water on the flames when things flare up, as this will send ash flying over your food. Try moving the food over the part of the grill with no coals underneath it instead.
  • If you are nervous about getting it right, use a meat thermometer to check it your meat is done. To make sure your meat is cooked to the right temperature, this is a link to a temperature cheat sheet.
  • If you have any leftover marinade, cook it up on the grill in a metal bowl to kill off any bugs. or pour it over the cooked meat as a sauce.
  • Consider rubbing in a separate marinade after you have cooked it. Barbecued fish is delicious if rubbed with very finely chopped parsley and garlic in olive oil. When cooking meat, smear some butter blitzed with herbs, salt, pepper and garlic on top of a chopping board. Place the cooked meat on the butter so it can melt and soak into the meat as you carve it.
  • Be lazy and don't clean your barbecue after use. If you leave the fat on the grill, it will prevent rust from forming. To clean it, get your grill nice and hot and then rub the charred debris off with a coarse wire brush.

Festive Holiday Baking

Are you a hybrid worker being forced to attend an office potluck?  Do you need a dessert for your child's Christmas bake sale?  Feel l...