Sunday, October 28, 2018

From the Shelf: Pumpkin Soup

You're going to be buying a pumpkin for Halloween anyway, why not buy one to make something good to eat? Discovered when I was going through the collections of cookbooks I own, this recipe from "The Black Family Reunion Cookbook" will be perfect for these chilly nights, and is a good way to recycle your gourd before it heads to the green bin.

Ingredients:
1.4-1.9 L chicken consommé (refrigerate before using and skim off the fat)
910 g fresh pumpkin, peeled and cut up
230-455 g smoked meat of your choice (suggestions include pork, neckbones, turkey); can be left out entirely if the soup needs to be vegetarian
100 g small size dried pasta (shells or elbow macaroni)
100 g shredded cabbage
40 g green beans, cut up (or other vegertables of your choice)
15 g chopped fresh parsley
3 carrots, thinly sliced
2-3 celery stalks
2 cloves garlic, minced
1 large onion, diced
  1. Cook the meat and the consommé in a large stockpot for 30 minutes (the consommé may be diluted with water.) Remove the meat and set aside.
  2. Add the pumpkin, celery, onion, garlic, and parsley to the pot. Cook for 30 to 40 minutes until the pumpkin is done. Remove from heat and let cool.
  3. Pour the contents of the stockpot in a blender and purée. Pour the purée back into the pot adding more consommé if the mixture is too thick.
  4. Bring the soup to a boil. Add the carrots, green beans (or whatever vegetable you're using), and pasta. Cook until the pasta is tender.
  5. If you are using meat in the recipe, slice or cut it up, and add it back to the soup. Add the cabbage, and cook for 10 minutes or until the cabbage is done but still crunchy.

    Serves 12. Store in covered airtight containers, and refrigerate any extra vegetable soup promptly. Properly stored, the soup will last for 3 to 4 days. Freeze it in covered airtight containers or heavy-duty freezer bags. Properly stored, it will maintain its best quality for about 4 to 6 months but will remain safe beyond that time.

"The Black Family Reunion Cookbook" from the National Council of Negro Women contains more than 250 recipe from home kitchens, and highlights the values, traditions, and strengths of the Black family.

Wednesday, October 17, 2018

The MagicalButter machine - Review of a herbal butter making device

While Canada has legalized marijuana, edibles containing marijuana are still prohibited and are not legally available for sale. For those unwilling to wait until the government revisits the issue of edibles in 2019, there is a fast and easy way to make your own edibles so you can ingest marijuana without having to smoke it. The MagicalButter machine is specifically designed for "infusing the essence" of your cannabis (or any other medicinal herb) into butter and oil, among other things, all while being small enough to fit on your kitchen counter. Made of stainless steel and fully automatic, it "...grinds, heats, stirs, and steeps..." the weed into a consistent infusion every time you use it and the recipes that come with the device. It also makes tinctures, is great for infusing alcohols with flavours for faster Limoncellos, and can be used to make skin care products, such as lotions and face creams. I know a guy who knows a gal who sleeps with a guy who has one, and he swears by the thing, saying it's as simple as putting the ingredients in, setting the temperature and time, and letting the machine do its thing. Whatever magical morsels you make is up to you, but please be aware of the health effects of cannabis - start out small, then wait at least 60-90 minutes to see if you're feeling the way you want to feel.

NOTE: I have not been paid by the makes of MagicalButter to produce this blog entry, but if MB World Headquarters wants to send something my way because of this, I won't object.

Friday, September 28, 2018

The Need To Know Classic That Is: Roasted Vegetables

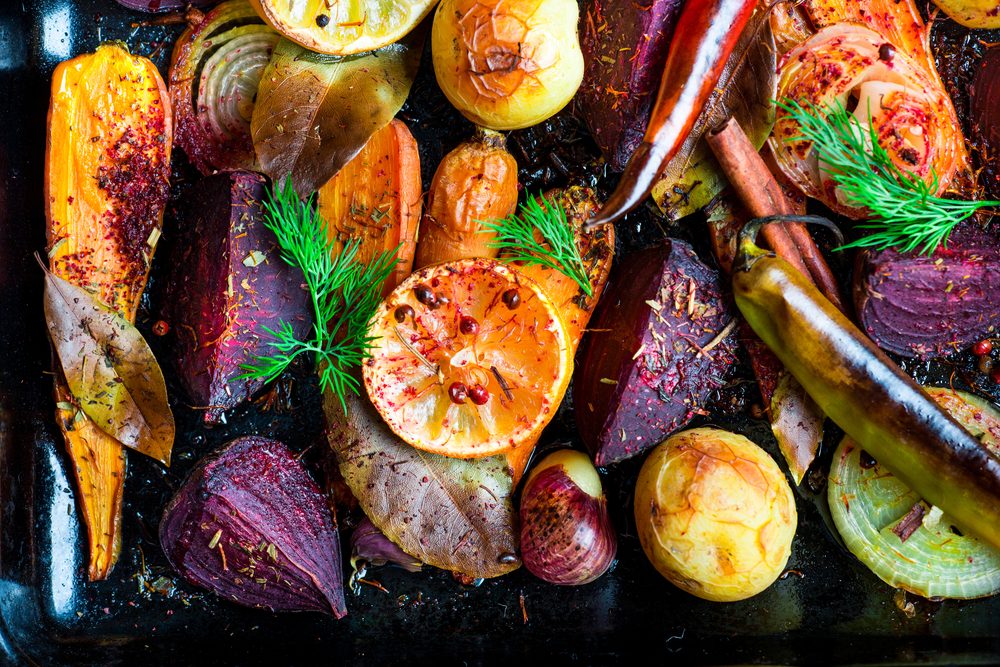
Adding vegetables to a meal is a great way to increase your fibre, nutrient and antioxidant intake. But one of the problems that vegetables have always had is that some methods of preparing them (I'm looking at you boiling...) turn vegetables into flavourless mush. Roasting vegetables allows you to keep the vegetables crisp, and, thanks to the Maillard reaction, is an easy way to bring out their flavour. So head to the produce section, and make the recipe below when you're feeling like a vegetarian meal, or when you need a side dish for any roast meats you want to serve.

Ingredients:
3 potatoes, cubed
2 bell peppers, seeded and diced
2 zucchini, sliced in 2 cm pieces
1 small butternut squash, cubed
1 small bag of baby carrots
1 sweet potato, peeled and cubed
1 red onion, quartered
150 g mushrooms, ends of stems cut off, chopped if desired
35 g fresh rosemary, chopped (8 g, dried)
15 g fresh thyme, chopped (4 g, dried)
12 g garlic, minced
60 mL olive oil
30 mL fish sauce (vegans can swap this out for balsamic vinegar)
salt
pepper
cornstarch
  1. Preheat oven to 245 °C.
  2. In a large bowl, combine the vegetables, separating the red onion quarters into pieces, and then adding them to the mixture.
  3. In another bowl, mix the thyme, rosemary, olive oil, fish sauce, salt, and pepper together. Pour the mixture into the bowl with the vegetables, and then mix everything until all the vegetables are coated. Sprinkle enough of the cornstarch on the vegetables so that they get a thin, even coating on them. 
  4. Spread evenly on a large roasting pan. Roast for 35 to 40 minutes in the preheated oven, stirring every 10 minutes, or until vegetables are cooked through and browned.

Friday, September 14, 2018

Review: "Eat What You Watch"

If there's one thing foodies love as much as food, it's movies involving food. You may not live the life of the character or the actor on the screen, but you can always relate to the food involved in the story. It's easy to get caught up in the excitement and anticipation in "Big Night"; who hasn't thought about slicing garlic with a razor blade after watching "Goodfellas"; and you can't but smile to yourself when in a deli eating pastrami after seeing "When Harry Met Sally...?. For those who want to further enjoy the food they see on the screen, I suggest the following cookbook for movie lovers, "Eat What You Watch", by Andrew Rea of "Binging with Babish" fame. In it, you will find over 40 recipes from films ranging from Charlie Chaplin's "The Gold Rush" to the award-winning "Moonlight", and everything else in between. One of my favourite recipes in the book is this unauthorized take on the Big Kahuna burger from one of my favourite movies, "Pulp Fiction". If you like burgers, give the recipe below a try sometime, you'll see why it's one tasty burger.

Ingredients:
120 g ground beef, divided into two balls
28 g butter
2 hamburger buns (Hawaiian bread rolls, if possible)
2 slices Monterey Jack cheese
2 fresh pineapple slices, about 1.25 cm thick
1 red onion, sliced into rings
vegetable oil
ketchup
teriyaki sauce
  1. In a large skillet, heat half of the butter over medium heat until it's foaming. Add the onion and cook slowly over low heat, stirring often, until the onion is caramelized about 30 minutes. Transfer the onion to a bowl, and set them aside.
  2. Wipe the skillet clean and heat the remaining butter over medium heat until it is sizzling. Add the pineapple slices and cook, turning once, until they are lightly browned on both sides. Transfer the pineapple to a plate, and set them aside.
  3. Using a cast-iron skillet, heat some of the vegetable oil over high heat until it just begins to smoke. Place the balls of ground beef in the skillet a few centimeters from each other, then smash them into thin patties with a spatula. Cook them for about 1 to 2 minutes until the bottom is well browned and crisp, flip, and top each burger with a slice of cheese. Turn off the heat, but leave the patties in the skillet to allow the cheese to melt.
  4. Toast and lightly butter the hamburger buns. Dress the bottom half of the bun with some ketchup and teriyaki sauce, add a hamburger patty, then top with a pineapple slice, some of the caramelized onions, and the other half of the bun.

Tuesday, July 31, 2018

Summertime Ceviche

Ever since I first tasted it at a cooking class at Urban Element I've been a fan of ceviche. It's the perfect dish for these steamy summer days when you don't want to add more heat to your home by turning on an oven. Ceviche is made using acids (citrus juices) that cause the proteins in the seafood used in the recipe to change on a molecular level similar to the change that occurs when the proteins are cooked. I like to use the recipe in my favourite cookbook, "Cooking For Geeks", with the addition of an element I learned at the Urban Element; I also like to listen to listen to Action Bronson's "Ceviche" while making this, but that's strictly optional.


Ingredients:
500 g bay scallops, rinsed and patted dry
130 g lime juice
60 g lemon juice
15 g ketchup
7 g garlic, chopped on run through a garlic press
18 mL olive oil
4 mL balsamic vinegar
1 small red onion (70 g ), sliced as thinly as possible
1 shallot bulb, sliced as thinly as possible
1 plantain
canola oil
  1. Mix everything but the scallops, plantain and the canola oil in a bowl. Add the scallops to the bowl and make sure everything gets covered by the marinade. Cover the bowl securely and store it in the fridge. Mix everything up again in two hours, then allow it to sit overnight to allow the acids to do there thing.
  2. Before you're ready to serve the ceviche, preheat 3 cm of canola oil to 190 C in a large skillet over medium-high heat (or plug in your deep fryer if you have one). Cut the ends from the unpeeled plantain, then halve it crosswise. Peel the plantain then cut it lengthwise into very thin slices (use a mandolin if you have it). Fry the strips in batches, turning frequently, until they are golden. Drain on paper towels, and season immediately with kosher salt.
  3. Take out the ceviche from the fridge, and plate it. Top with the fried plantain you have made.

Sunday, July 15, 2018

Make Ice Cream Better With Chocolate Dip

During the heatwave we've experienced this summer, my wife and I decided to treat ourselves to some ice cream. As we ate from our bowls, we groused about how we never see ice cream trucks in our neighbourhood and reminisced about how good we had it back in the day when the Dickie Dee men used to sell frozen treats from freezer units on tricycles. It was then when Dawn mentioned that her favourite type of ice cream cone are the ones dipped in chocolate, and asked me if I knew how they get the chocolate to harden on the ice cream so quickly. I had no idea, so off I went to the interwebs. The chocolate you see people dip soft-serve ice cream in contains oils high in saturated fat. A drop in temperature causes saturated fats to harden and take on a glass-like consistency. When you emulsify coconut oil with melted chocolate, the mixture remains a stable liquid at room temperature, but as soon as you drizzle it over ice cream, it chills down fast and hardens into a tasty shell. With this knowledge, it is now easy to bring the feel of an ice cream parlour into your kitchen with the following recipe:

Ingredients:
250 g dark chocolate, 66% to 72%, finely chopped
200 g refined (not unrefined or virgin) coconut oil
125 g light (clear) corn syrup
  1. Combine the chocolate, coconut oil, and corn syrup in a microwave-safe bowl. Microwave on half power in short 15 second bursts, stirring with a spoon in between, 3 to 4 times, until the chocolate is completely melted. If the mixture is heated too much, the chocolate may break, forming harmless brown speckles in the sauce; to re-emulsify the sauce, blend in a blender on high speed for 30 seconds.
  2. Transfer chocolate dip to a container and store at room temperature, stirring with a spoon if it separates. For best results, let the dip harden on ice cream for 30 seconds before eating.

Sunday, June 17, 2018

Father's Day Spice Rub

Kid Franklin's Special BBQ rub
A spice or dry rub is a great way to get a lot of flavour onto a piece of meat. They add a nice crust to the food and work well whether the meat is grilled, roasted, broiled, or baked. On this Father's Day, I'm going to share the recipe for the all-purpose rub my son made for me at elementary school.

Ingredients:
45 g sugar
30 g brown sugar
30 g smoky paprika
30 g Kosher salt
15 g cumin
15 g chili powder
15 g black pepper
15 g onion powder
15 g garlic powder
15 g celery salt
5 g oregano
  1. Mix all the ingredients well. Rub on all sides of any meat you want to eat before cooking.

Festive Holiday Baking

Are you a hybrid worker being forced to attend an office potluck?  Do you need a dessert for your child's Christmas bake sale?  Feel l...