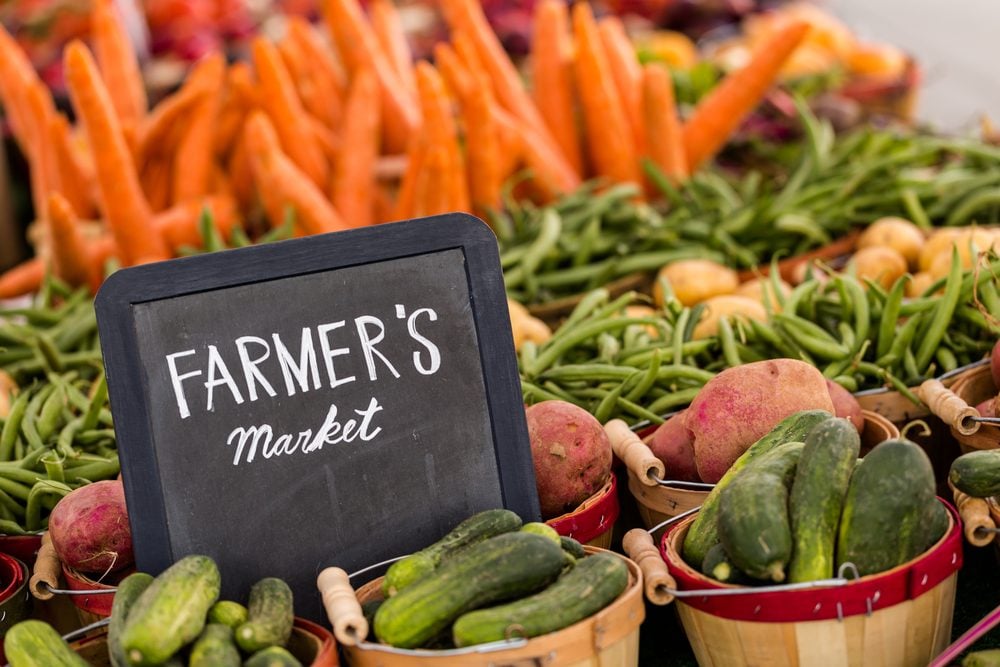
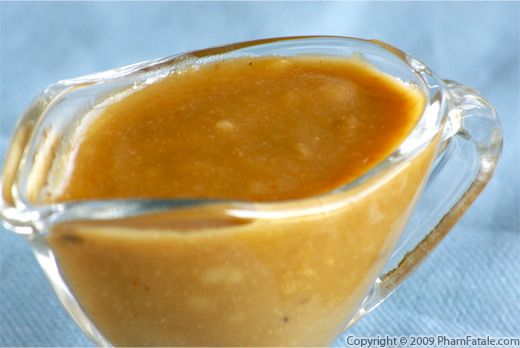
You don't have to love fruits and vegetables to take advantage of the local farmer's market. Do it to support local business and farmers; do it if reducing your carbon footprint is a concern to you, or do it to try a new recipe using produce you can certain of its freshness and quality. In the last of this series for the year, this month's featured ingredient is garlic. Related to the onion, garlic is a popular seasoning around the world and is known for its pungent, spicy flavour that mellows and sweetens considerably with cooking. In spite of its habit of giving eaters of it bad breath (this is due to allyl methyl sulfide, a volatile liquid that is absorbed into the blood during the metabolism of garlic-derived sulfur compounds; from the blood it travels to the lungs, and from there to the mouth, causing bad breath), garlic can be found in a variety of classic dishes, such as garlic bread, garlic toast, bruschetta, crostini and canapé. It also makes the delicious emulsion that is garlic aioli, a dipping sauce that is great on roasted chicken, grilled fish, steamed vegetables, potatoes, or on anything you would put flavoured mayonnaise on. Once you make this recipe for it from one of my favourite cookbooks, you won't be able to eat foods without it.
Ingredients:
180 mL grapeseed oil
120 mL light olive oil (extra virgin olive oil can be used, but it's known to give a metallic taste when blended at high speed)
15 g Dijon mustard
3 g kosher salt
2 garlic cloves (minced if you don't have an immersion blender)
1 large egg yolk
juice from one lemon half (about 45 mL)
cayenne pepper to taste
There are two ways to make this recipe:
Traditional Blend all the ingredients together except for the oils. Slowly drip each oil in while whisking them into the other ingredients either by hand or with an immersion blender.
Quick and Dirty (works more often than not) Blend everything until it gets a dipping sauce-like consistency.
Whatever way it's made, this sauce is good for 5 days refrigerated.
T.V. sitcoms have given meatloaf a bad rap. For years we have associated meatloaf with a tasteless lump of meat made by the most ornery of mother-in-laws, but chopped meat mixed with bread and spices and cooked in loaf form has been eaten since the days of ancient Rome. It's been a staple meal since the Great Depression, and today both Michelin star chefs and home cooks have elevated meatloaf to its rightful place as a comfort food favourite.
Ingredients:
675 g ground beef, lamb, or pork
15 g onion, finely chopped
5 g teaspoon basil
5 g teaspoon dried mustard
5 g dried thyme
5 g garlic powder
5 g onion powder
5 g paprika
1 slice white bread, fresh, stale, doesn't matter
1 egg
1 beef bouillon cube, crumbled
ketchup
milk
salt and pepper
Worcestershire sauce
Preheat the oven to 180 C. Put the slice of bread in a shallow bowl and add enough milk to cover it. Let the milk soak in for about five minutes, pour out the excess, and press out as much milk as you can from the bread using the back of a spoon.
In a large bowl mix the bread, the meat, the spices, the egg, and the bouillon cube together; add what you would consider an appropriate amount of salt, pepper ketchup, and Worcestershire sauce. Shape the mixture into a loaf, then place it either in an ovenproof dish or on a baking sheet, and cook for 30-45 minutes, until the juices run clear when it's pierced with a toothpick. Serve in slices with gravy and mashed potatoes; melted cheese on top is optional.
You don't have to love fruits and vegetables to take advantage of the local farmer's market. Do it to support local business and farmers; do it if reducing your carbon footprint is a concern to you, or do it to try a new recipe using produce you can certain of its freshness and quality. This month's featured ingredient is everyone's favourite gourd the pumpkin. More than a Halloween decoration and a pie filling, pumpkins can be boiled, steamed, or roasted, and are an excellent source of beta-carotene. When used as a base for a soup, pumpkin adds a savoury smoothness that will warm you up on these chilly fall evenings, making this recipe a perfect meal to have before or after trick-or-treating.
Ingredients:
1 sugar pumpkin
1.4 L chicken stock
120 mL heavy whipping cream
7.5 g salt
5 g chopped fresh parsley
150 g chopped onion
2.5 g chopped fresh thyme
1 clove garlic, minced
5 whole black peppercorn
Preheat the oven to 165 °C. Cut the pumpkin in half from stem to base, then remove the pulp and the seeds (save and roast them for a bonus treat). Cover each half with foil, and bake in the oven, foil side up, for one hour, or until they are tender.
Scrape the pumpkin meat from the shell halves and puree it in a blender. Strain everything to remove any remaining stringy pieces, and set aside 4 cups worth of the puree. The rest can be stored in the freezer in freezer safe bags.
On the stove, heat the chicken stock, pumpkin puree, onion, thyme, garlic, salt, and peppercorns to a boil, then reduce the heat to low, and simmer for 30 minutes uncovered.
Puree the soup in small batches using a food processor or blender. Return everything to the saucepan, and again bring the soup to a boil. Reduce the heat to low, then simmer uncovered for another 30 minutes. Stir in the heavy cream, then pour into soup bowls and garnish with fresh parsley.
The best gravies are made from pan drippings, something vegetarians miss out on because of the lack of meat they eat. A way for non-meat eaters to add some savouriness to their meals is to use the following recipe that takes advantage of the flavour boosting properties of miso. Found in either Asian grocery stores or at Whole Foods, miso is a thick paste-like substance made from fermented soybeans. Extremely salty and tangy, the milder versions of miso are white or yellow in colour, with the darker brown and red varieties having a stronger taste. Commonly used in soups and marinades, the traditional Japanese miso made from soy is gluten-free, while miso made from barley, rice, or other grains may not be. With its natural umami flavour, this gravy will stand on its own merits at your dinner table and will win over both carnivores and vegans.
Happy Thanksgiving everyone!
Ingredients:
710 mL vegetable broth
30 mL water
15 mL soy sauce
60 g flour
30 g miso
30 g vegan margarine (look for it in health stores or at Whole Foods)
15 g nutritional yeast
5 g cornstarch, dissolved in 30 mL water or soy milk, as needed
2 g black pepper
Combine the miso and the water and whisk them both together until the miso is completely dissolved in the water (the water can be heated up a bit first in order to speed things up).
In a large skillet, melt the vegan margarine over medium-low heat and whisk in the flour until a paste forms. Add the miso and water mixture, along with the vegetable broth, soy sauce, nutritional yeast, and the black pepper and stir to combine well.
Allow to cook over low heat until thickened, stirring frequently to avoid any lumps forming as the liquid thickens up as with non-vegan gravy. Add the cornstarch (dissolved in the liquid of your choice first) if needed, to make the gravy even thicker if needed, keeping in mind the gravy will thicken slightly as it cools.
You don't have to love fruits and vegetables to take advantage of the local farmer's market. Do it to support local business and farmers; do it if reducing your carbon footprint is a concern to you, or do it to try a new recipe using produce you can certain of its freshness and quality. This month's featured ingredient is the teacher's favourite the apple. Around since prehistoric times, apples are grown all around the world and have been cultivated for over 3000 years. There are 15 different main varieties of apples are grown in Ontario, with the McIntosh, Gala, Empire, Red Delicious, and Northern Spy varieties the most popular. If you're planning an apple-picking trip in the near future, a great recipe to try is for apple butter, a cooked-down version of applesauce that is sweeter and richer in flavour. Great on toast, pancakes or fruit parfaits, apple butter can be also used as a fat substitute in reduced-fat or fat-free cooking, as well as in vegan recipes.
Ingredients:
1 kg Ontario apples peeled, cored and diced in 5 mm pieces
175 g granulated sugar
2.5 g cinnamon
125 mL apple cider
30 mL apple cider vinegar
Combine all the ingredients in a heavy-bottomed saucepan and place over medium-low heat.
Cook uncovered until the apples are very tender and have darkened, occasionally giving everything a stir. After about 60 to 70 minutes, remove the mixture from the stove and let it cool.
Puree everything using either a blender or an immersion blender. Pour the apple butter into a clean container, cover and chill in your refrigerator, it should be good for up to two weeks.
This year's summer left a lot to be desired. Only two weekends from June 1 were rain free; on the days that it didn't rain, it wasn't warm. And the less said about the washout that was Canada Day, the better. It is now officially autumn, and with the threat of another bone-chilling winter ahead of us, why not remind yourself of what summer could have been with some preserved lemons? Pickling lemons supercharges their flavour, giving them a zing that you don't get from regular lemon juice or zest. A staple in Moroccan and Middle Eastern cuisine, they're great chopped up in salads and salad dressings, pestos, guacamole, hummus, and salsas; and in any chicken or fish recipe that requires lemon. And the best part about preserved lemons is that they are very simple to make, allowing you time to enjoy the nice weather we are currently experiencing.
Ingredients:
lemons
salt (kosher perferred, sea or table is fine)
water that has been boiled and cooled
Wash the lemons, then trim the nubs off both ends of each lemon. Quarter each lemon, slicing them down just over three-quarters of the way to leave the slices attached at the end. Put one teaspoon of salt into the cavity of each lemon.
Place about 5 g of salt into the bottom of a sterilized canning jar. Put one of the lemons in the jar, cut-side down, pressing firmly to squeeze out the lemon juice. Sprinkle another 5 g of salt on top of the lemon.
Repeat the process of stuffing a lemon into the jar and topping it with salt. The jar should be halfway full with lemon juice. If needed, squeeze some additional lemon juice into the jar to bring it to the halfway point (don't waste that lemon; slice it and stuff the slices into the jar). Once there is no more space in the jar for more lemons, pour the water into the jar to fill it to the top.
Screw the lid on the jar and store it in a cool, dark place at room temperature for three days, shaking it and rotating the jar a few times per day. After three days transfer the jar to the refrigerator and let them sit for at least a month before using (the longer you let it sit, the better). The lemons can be stored in the fridge, or in that dark, cool place they were left to pickle in for at least 6 months. Whatever dish you use them in, be sure to discard the pulp and to thoroughly wash the peel you use to remove any excess salt.
With rib festivals happening numerous times throughout the year over the city, Ottawa's love for grilled meat has been well established. In honour of the Orleans Ribfest, I decided to try making some pork ribs using the cardboard smoker box method popularized by the cooking world's mad scientist Alton Brown.
Build Materials:
cardboard box (big enough to hold a BBQ grill in, but not so big it will take forever to heat up, something under a metre high and at least 60 cm.wide)
2 wooden dowels
BBQ grill
aluminum foil
aluminum pie pan
hot plate
old frying pan
wood chips
probe style cooking thermometer
small fan (optional)
I lined as much of the inside of the box with aluminium foil as a safety precaution.
I then cut a hole in the bottom of the box as shown below, in order to make access the wood chips easier during cooking.
Because the food needs a place to be cooked on, I inserted the wooden dowels through the box and placed the grills from my propane BBQ on top.
When it was time to start cooking, I hauled everything up from the basement, and set it up outside, placing the hot plate in the centre of the box through the hole in the bottom. I soaked the wood chips as instructed on its packaging, and then filled the frying pan with the wood chips. Placing the frying pan on the hot plate, I topped it with a pie plate with holes poked through the bottom, allowing the smoke to fill the box while protecting the burner from any juices that drip from the meat. I then plugged the hot plate into an outlet and turned it on. If you have a small fan, you place it in a corner of the box away from the hot plate so it can circulate the hot air and the smoke throughout the box, but don't be surprised if the fan runs out of power, or shuts down during the cooking process as mine did.
45 g kosher salt
30 g chile powder
30 g light brown sugar
30 g garlic salt
30 g paprika
20 g dried thyme
20 g ground cumin
20 g celery seed
10 g black pepper (freshly ground if possible)
Mix all the ingredients together in a bowl. Season the ribs with rub you created.
I placed the ribs on the grill bone side down, and then closed the box up to allow it fill with smoke. I had to be careful as the box got warm to the touch quickly About every half-hour or so, or whenever I saw less smoke coming out of the box, I carefully checked on the wood chips in the frying pan, dumping out the burnt up wood in a fireproof container, and adding more wood chips, and adjusting the temperature control on the hot plate as needed.
YOU ARE DEALING WITH FLAMMABLE OBJECTS ENCASED IN A FLAMMABLE OBJECT - DO NOT LEAVE THE SMOKER BOX UNATTENDED! Knowing the ribs will take at least 4-5 hours to cook, I did some yard work in the backyard, then enjoyed a few of my favourite IPAs while watching the pilot episodes of "The Defenders" and "G.L.O.W." (I liked the former more than the latter) and some "Lucha Underground" on Netflix while watching the ribs cook. Every hour or so I flipped the ribs to make sure they were evenly cooked, and sprayed them with the following liquid to keep them moist:
Ingredients: Mop / Spray Bottle liquid
240 mL apple juice
120 mL apple cider vinegar
30 mL Worcestershire sauce
Combine the ingredients in either a spray bottle or a bowl if you prefer using a BBQ mop.
After several hours of smoking, I finished the ribs on my BBQ so my hungry family could get their dinner. The ribs tasted great, tender and flavourful, I was surprised by how much smokiness I got on the meat. I may not win any grilling competitions with this method, but it's not bad for something you can make with stuff you may already have lying around your house, and it's something to try in between ribfests while drinking beer in the great outdoors.