Showing posts with label bake. Show all posts

Saturday, December 4, 2021

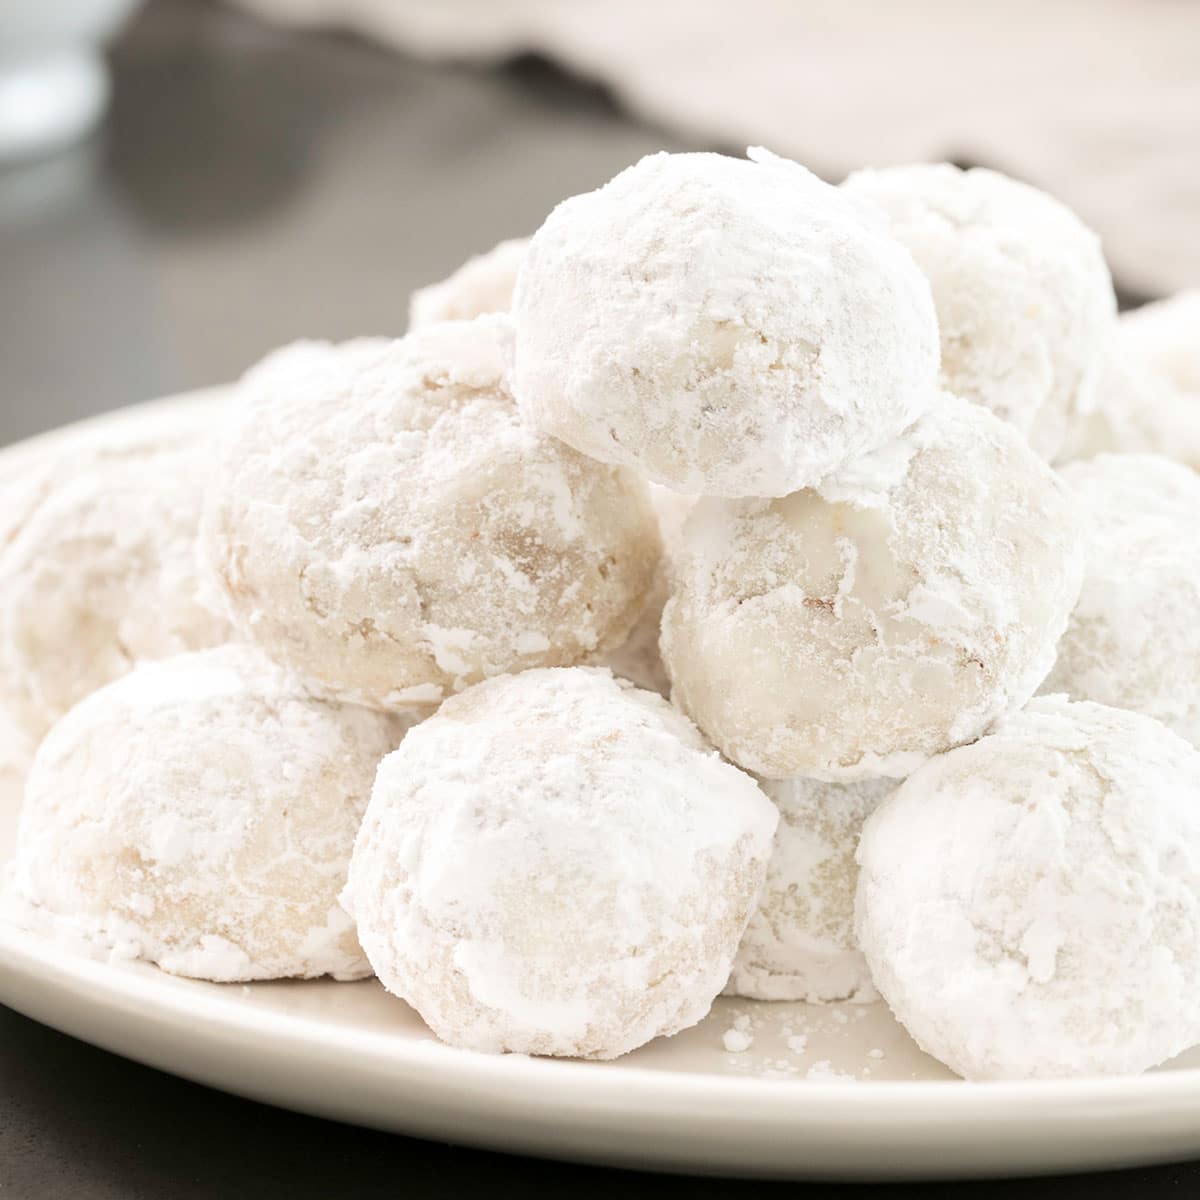
Baking Snowballs

Whether you call them Mexican wedding cakes or Russian tea cakes, it's easy to see why these pastries are affectionately called snowballs. They're white, they're round, and like the frozen projectiles they resemble, they're very easy to make. As we enter the holiday season, you can be sure that a plate of these cookies will be a welcome addition to any Christmas potluck or office get-together. Just remember to follow public health guidelines to protect yourself and others.

Ingredients
560 g all-purpose flour
230 g butter
125 g chopped pecans
65 g confectioners' sugar
45 g confectioners' sugar for dusting, or as needed
(if you don't have any confectioners' sugar on hand, pulse 200 g of white sugar with 14 g cornstarch in a blender or food processor until it looks powdery)
35 g finely crushed peppermint candy canes (optional)
1.5 g teaspoon salt
5 mL vanilla extract
  1. Preheat your oven to 175 degrees C.
  2. Blend the butter with 65 g of confectioners' sugar and the vanilla extract. Mix in the flour, pecans, and salt. Roll about a tablespoon or so of dough into balls and place on an ungreased cookie sheet.
  3. Place the cookie sheet in the oven and let the cookies bake for about 15 minutes or until they are golden. Do not allow them to get too brown - it's better to undercook them than to overcook them. 
  4. While the cookies are still hot, roll them in the remaining powdered sugar. Once they have cooled, give them another roll in the sugar. For some extra Christmas cheer, add the candy cane dust to the sugar used for the final dusting.

Monday, June 28, 2021

Legends of Canadian Pastry: The Butter Tart

The Sweet Canada: Domestic stamps series
As we can now interact with more people as vaccination numbers increase, be the hit of your backyard barbeque with some buttery goodness. Butter tarts have been a favourite ever since France send women to help colonize their Quebec territory 350 years ago, and they adapted the recipes they brought with them with what was available in their new home. Today, most butter tart recipes are a variation of a recipe from 1900 submitted by Mary Ethel MacLeod to The Women's Auxiliary of the Royal Victoria Hospital Cookbook. Whether you like them firm or slightly run, or with (or without) raisins or pecans, the recipe below will satisfy your cravings.

Ingredients
12 pre-made tart shells
(If you have a favourite homemade pie crust recipe, feel free to use it; if you need one, here's a good recipe.)
50 g butter, melted and cooled
90 g brown sugar, lightly packed
170 mL corn syrup
2.5 mL vanilla
1 egg
salt
120 grams raisins (optional)
40 grams coarsely chopped pecans or walnuts (optional)
  1. If you are making a pie crust from scratch, prepare the dough and refrigerate it for 30 minutes. In the meantime, pre-heat the oven to 204°C, and grease and flour the muffin tin you plan to use.
  2. Remove the pie pastry from the fridge and roll it out to a 3mm thickness and cut out pieces with a round cookie cutter or a glass. Gently form the dough into the muffin tin.
  3. If you want raisins in your butter tarts, place them in a medium bowl, cover them with boiling water, and let them sit for 5 minutes. Remove the raisins from the water and immediately stir them in the butter, then add the egg, vanilla, brown sugar, corn syrup, and a pinch of salt and combine well. If you want nuts in your tarts, this is where you can add them into the mix.
  4. Pour the filling into the prepared tart shells and bake for 15 minutes, then reduce heat to 177°C and continue baking for approximately 10 - 15 minutes or until they start to brown.  Let cool before serving. Store the tarts in an airtight container and refrigerate for up to five days, or keep them at room temperature; keep in mind they will only keep for up to two days.

Wednesday, July 1, 2020

Legends of Canadian Pastry: The Nanaimo Bar

The Sweet Canada: Domestic stamps series
Looking for something to do this Canada Day? Celebrate by making one of most Canadian of desserts, the Nanaimo bar. The most addictive thing to come out of British Columbia other than marijuana, the no-bake dessert bar was popularized in the years following World War 2, reaching national notoriety after Expo 86. Traditionally consisting of three layers (a graham wafer crumb and shredded coconut base, custard-flavoured butter icing in the middle, and a chocolate ganache on top), the official city of Nanaimo-approved version of the pastry came to be after Joyce Hardcastle's recipe won a contest the city held. With Canada Day options limited this year, why not give this recipe a try? It will definitely add to the excitement of virtual fireworks - stay safe and happy Canada Day everyone.

Ingredients - Bottom Layer
425 g graham wafer crumbs
250 g shredded coconut
125 g unsalted butter (European style cultured if possible)
125 g finely chopped almonds
75 g cocoa
50 g sugar
1 egg, beaten
  1. Melt the first 3 ingredients in the top of a double boiler. Place on the stove over medium heat and bring the water to simmer. 
    • If you don’t have a double boiler, half-fill a saucepan with water and heat over medium heat until the water begins to simmer. Then, place a metal or glass bowl over the simmering water and proceed as directed.
  1. Add the egg and stir to cook and thicken. Remove from heat. 
  2. Stir in the crumbs, the coconut, and the nuts. Press firmly into an ungreased 2 L baking pan.
Ingredients - Second Layer
500 g icing sugar
125 g grams unsalted butter
30 g vanilla custard powder
40 mL cream
  1. Cream the butter, cream, custard powder, and icing sugar together well. Beat until light and fluffy. 
  2. Spread it over the bottom layer.
Ingredients - Third Layer
115 g semi-sweet chocolate
30 g unsalted butter
  1. Melt the chocolate and the butter over low heat. Remove it from the heat and let it cool. 
  2. Once cool, but still liquid, pour it over the second layer. Cover everything and let it chill in the refrigerator until cold.

Tuesday, March 17, 2020

Animated Eats: The Upside Down Flint-Rubble Double Bubble Cake

If you lived in Ottawa at any point in the 80s, you saw one of these cartoons on CJOH at noon - the underrated "Rocket Robin Hood", retro "Spider-Man", or the classic Hanna-Barbera creation "The Flintstones". One of my most cherished childhood memories is of me coming home from school and watching Fred and Barney's pre-historic adventures while eating a hot dog my mom made me for lunch.  On this day back in 1961, the episode "In the Dough" featured Fred and Barney posing as their wives in order to win a baking competition. The recipe used was for a dessert their wives dubbed the upside-down Flint-Rubble bubble cake. As the actual recipe for this was just a part of animated lore, one would assume that if it existed, it would show that the cake was baked in a single pan with its toppings (some sort of chopped or sliced fruits) on the bottom of the pan before the batter is poured in to form a baked-on topping after the cake is inverted - hence it being “upside-down”. To pay tribute to this cartoon cake, I decided to post a recipe from another childhood memory of mine - looking through my mom's copy of The all new Purity Cook Book: A Complete Guide of Canadian Cooking. I always loved the picture of the pineapple upside-down cake they used, and I was crushed when I saw they used a black and white photo for the reproduction of the original 1967 edition I have. So yabba-dabba-doo yourself a favour, and celebrate this day in TV food history by making this as a St. Patrick's Day dessert; if you insist on having a wee bit o' the green, you sticklers can use green Maraschino cherries in the recipe below.

Ingredients:
pineapple rings (fresh or canned, your choice)
Maraschino cherries (optional)
1 egg
250 mL milk
5 mL vanilla
200 g white sugar
190 g flour
100 g brown sugar, lightly packed
65 g shortening (butter or margarine can be substitistied as technically any fat that’s used in baking is considered “shortening”)
40 g butter or margarine
10 g baking powder
5 g salt
  1. Preheat the oven to 176°C. Melt the 40 g butter/margarine and pour it in a 20 x 20 cm baking pan.
  2. Sprinkle the brown sugar on what's in the baking pan, then cover it with the pineapple rings; if desired, place a cherry on the center on the rings.
  3. In a bowl, combine the remaining sugar and whatever you are using for shortening, then add the egg and the vanilla. Beat until the mixture is light and fluffy.
  4. Blend together the flour, baking powder, and the salt in a separate bowl. Add the contents to the first bowl, then mix everything together. Pour in the milk and then mix again.
  5. Pour the batter over the contents of the baking pan. Bake in the oven for 40-50 minutes. Once the cake is done, invert it onto a serving plate immediately. Serve warm.

Friday, October 11, 2019

Legends of Canadian Pastry: The Sugar Pie

The Sweet Canada: Domestic stamps series
This Thanksgiving weekend, consider ending your holiday feast with a dessert rooted in French culture. For the early settlers of Québec, brown sugar was rare, and it something needs to be sweet, maple syrup was the only available sweetener  While the tarte au sucre is a common pastry in France, the use of maple sugar or syrup is what gives the French-Canadian version its distinct taste. With the recipe below, you can quickly see why this treat has been enjoyed for centuries.

Happy Thanksgiving to you and yours.

Ingredients
1 pre-made pie crust
(If you have a favourite homemade pie crust recipe, feel free to use it; if you need one, here's a good recipe.)
1 egg
375 mL amber maple syrup
125 mL 35% heavy cream
15 g cornstarch
15 g unbleached all-purpose flour
  1. Preheat the oven to 200°C. Adjust the rack in your oven to the lowest position.
  2. Combine the cornstarch and flour in a bowl. Add the maple syrup and whisk until the mixture is smooth and the cornstarch has dissolved completely. Add the cream and egg. Whisk everything until smooth and pour into the prepared pie crust.
  3. Bake for at least 45 minutes or until the filling has set. A good test is to shake the pie back and forth a bit. If the center is still liquid, it needs to bake some more. When shaking produces a movement that looks like soft pudding, it’s ready. Let cool at room temperature for at least 2 hours before serving.

Monday, August 12, 2019

Legends of Canadian Pastry - The Blueberry Grunt

The Sweet Canada: Domestic stamps series
When it's time for some baking therapy in Atlantic Canada, some people like to make blueberries grunt. The grunting comes from the sounds made when cooking this dessert of tea biscuit dumplings cooked in blueberries. Also known as a “slump” or “fungy” (this dessert gets the short end of the stick when it comes to names), the blueberry grunt was first made either by early colonial settlers as an adaptation of British pudding using local ingredients, or as a food cobbled together by the Acadians from what they foraged in the area.  In any case, this recipe is a tasty way to take advantage of the anti-inflammatory properties, antioxidants, vitamin C and potassium that blueberries have to offer.

Ingredients
400 g blueberries (fresh or frozen)
280 g flour
225 g sugar (To cut back on sweetness, use 3⁄4 the amount instead)
115 g butter
14 g baking powder
4 g sugar
2 g salt
120 mL milk
5 mL lemon or lime juice
1 egg

Note: Measurement conversions from Cook It Simply/ 
  1. Preheat the oven to 220 °C. Pour the blueberries into an oven-safe deep-dish pie plate and add the citrus juice and the larger amount of sugar. Stir well, then place the pie plate in the oven and bake uncovered, 10 to 15 minutes if you are using fresh berries, 20 minutes for frozen berries. 
  2. While the berries are in the oven, whisk in a large bowl the flour, baking powder, salt, and the remaining sugar. Break the butter into small pieces and add to the mixture in the bowl. Combine the butter into the flour mixture with a fork until the butter and mixture have formed small crumbly pieces. Crack the egg into a measuring cup and top with milk until you hit the  3⁄4 cup mark. Mix the egg and milk together with a fork, then add it to the flour mixture and blend with a fork until everything is combined — mix in any remaining dry bits by hand. 
  3. Take the blueberries out of the oven. Using a  1⁄4 cup measuring cup (or your largest spoon), scoop out the biscuit dough from the bowl, and arrange on top of the hot berries - you should get about 11 biscuits. Carefully cover the dish tightly with aluminum foil and put it back in the oven to bake for 15 minutes. 
  4. Remove the dish from the oven and carefully remove the foil, then place back in the oven and continue to bake, uncovered, for 10 minutes or until the biscuits are lightly golden. Take the dish out of the oven, and allow it to cool for 10 minutes or so —the longer the grunt sits, the more blueberry liquid the biscuits will soak up. Serve hot or warm, ideally with either ice cream or whipped cream either as a dessert or for breakfast.

Festive Holiday Baking

Are you a hybrid worker being forced to attend an office potluck?  Do you need a dessert for your child's Christmas bake sale?  Feel l...